1.1.5.2. バックアップ・リストアに必要な先進認証を準備する
本ガイドでは、バックアップサーバーがArcserve UDP、M365と連携する際に使用する先進認証の準備に関する手順を記載します。
注釈
- [基本認証]の選択肢も表示されますが、 以下公式サイトより廃止予定となる旨のお知らせが出ていますので[先進認証]をご利用ください。
バックアップサーバーを設定する
- PowerShellを起動し、「Get-Host | Select-Object Version」よりPowerShellバージョンが5.1以上であることを確認します。
> Get-Host | Select-object Version

   Version
   -------
   5.1.14393.4583
- PowerShell スクリプト 「Script2InstallPrerequisites.ps1_」 をダウンロードします。必要なシステムコンポーネントを手動でインストールする場合は、以下サイトをご参照ください。プロキシマシンの準備を手動で行う ※プロキシマシン=バックアップサーバーです。
- スクリプト名の語尾にあるアンダーバーを削除し、「Script2InstallPrerequisites.ps1」に変更します。
- 管理者権限を持つユーザーにて、「Script2InstallPrerequisites.ps1」を右クリックし、[PowerShellで実行]をクリックします。
Checking PowerShell version
PowerShell Version 5.1 or higher check is successful

Checking .Net Framework
.NetFramework Version 4.7 or higher check is successful

Setting the [Net.SecurityProtocolType]::Tls12.
Installing Nuget package

Name                           Version          Source           Summary
----                           -------          ------           -------
nuget                          2.8.5.208        https://onege... NuGet provider for the OneGet meta-package manager
Installation of the NuGet Package is successful
Installing PowerShellGet
Installation of the PowerShellGet Module is successful
Installing AzureAD
Installation of the AzureAD Module is successful
Installing Exchange Online Management Module
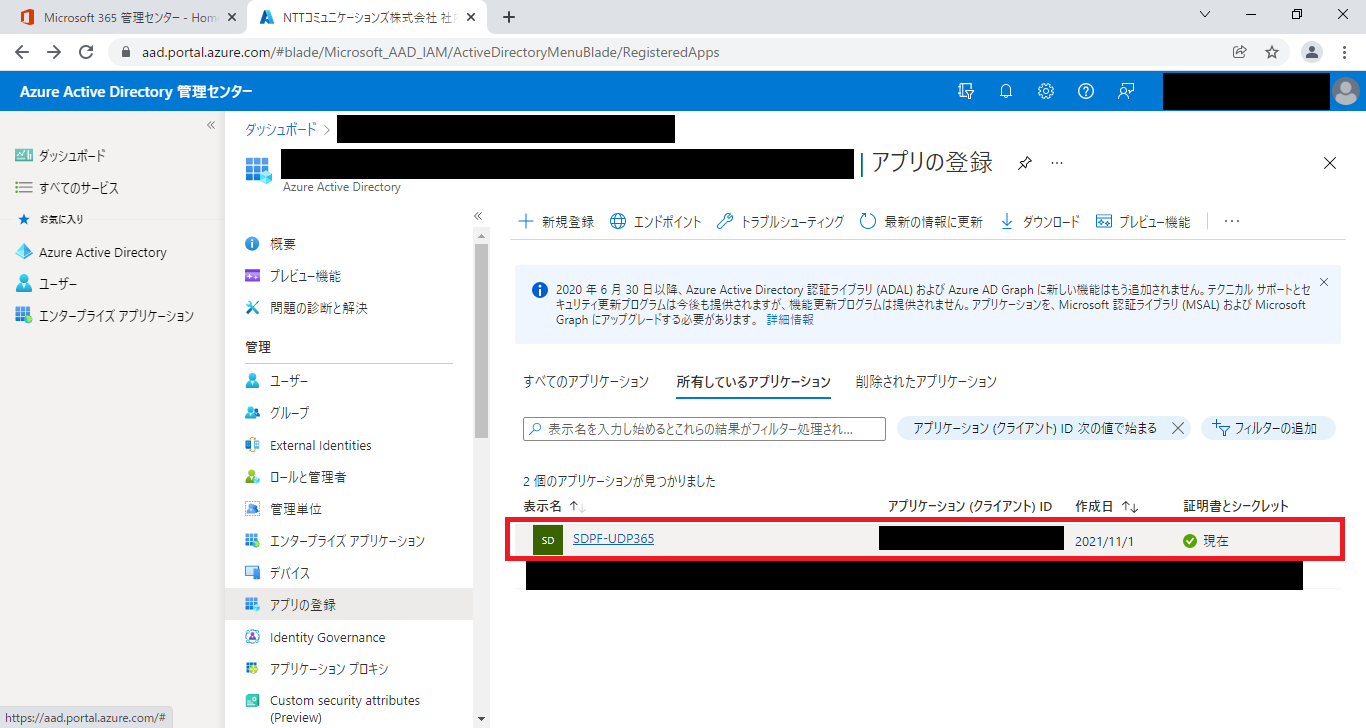
Azure Active Directory 管理センターでアプリケーションを登録する
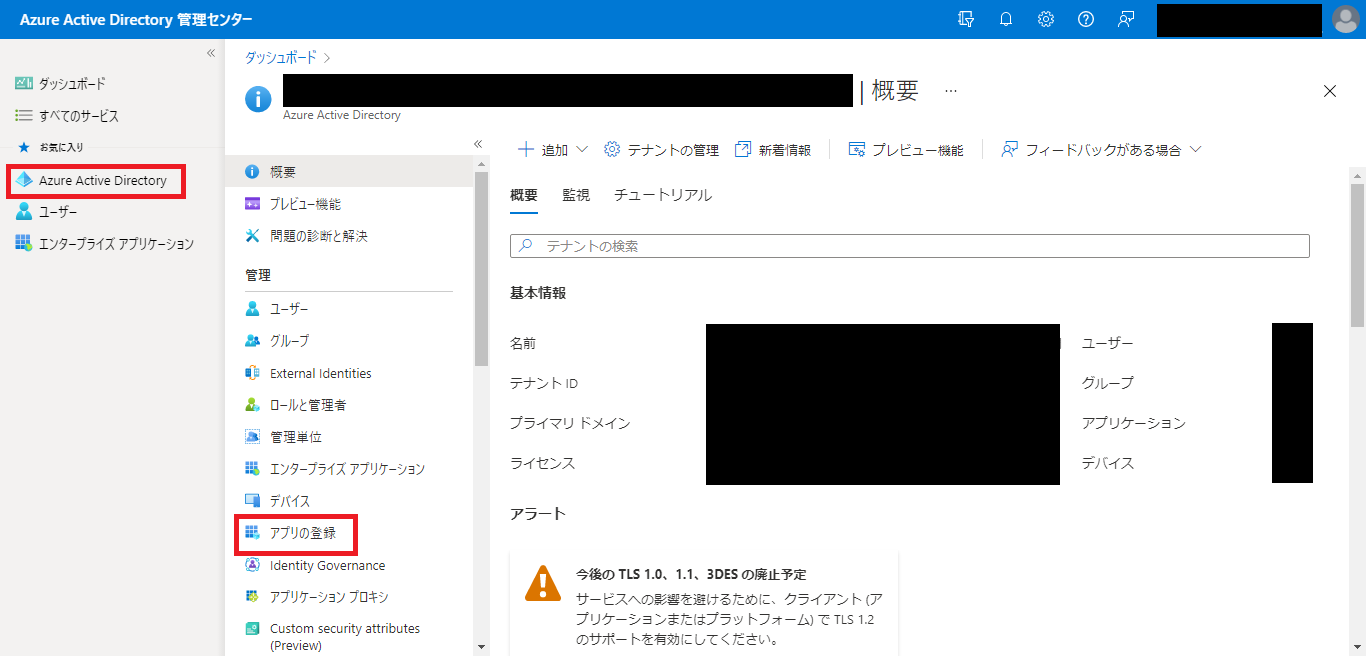
- Azure Active Directory 管理センター にログインします。
- 左ペインから[Azure Active Directory]を選択し、[アプリの登録]をクリックします。
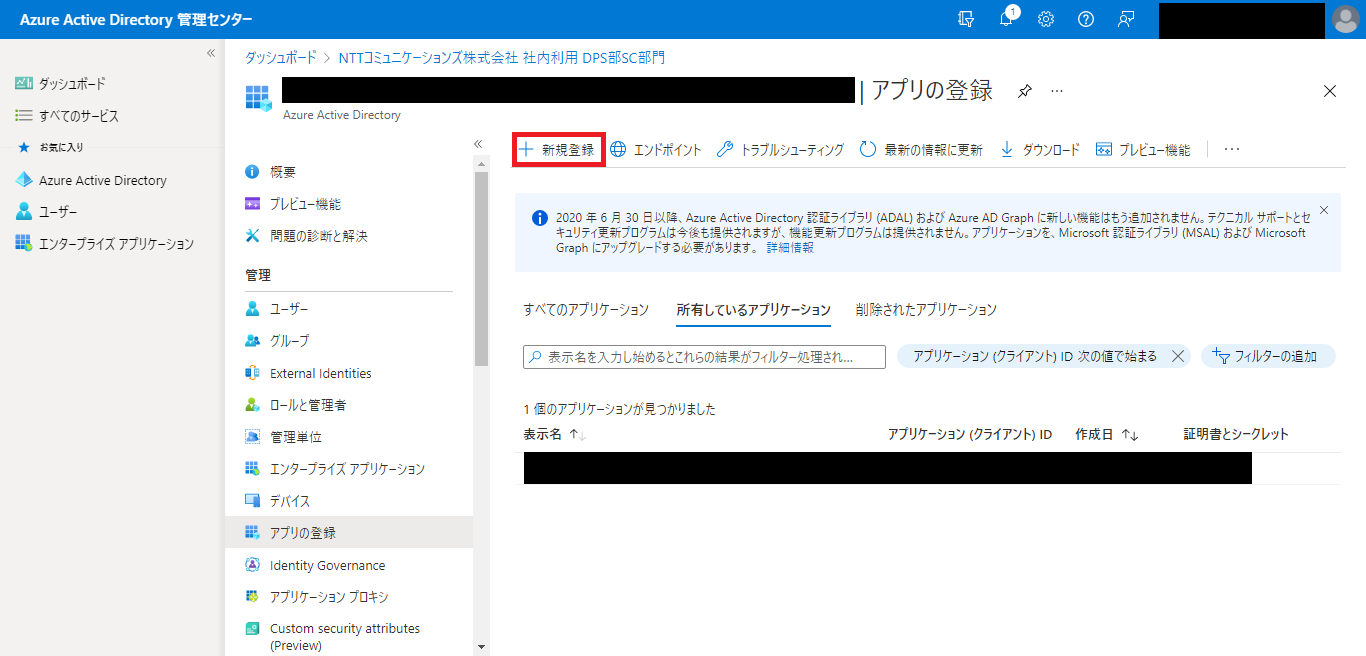
- 「アプリの登録」ページで、[新規登録]をクリックします。
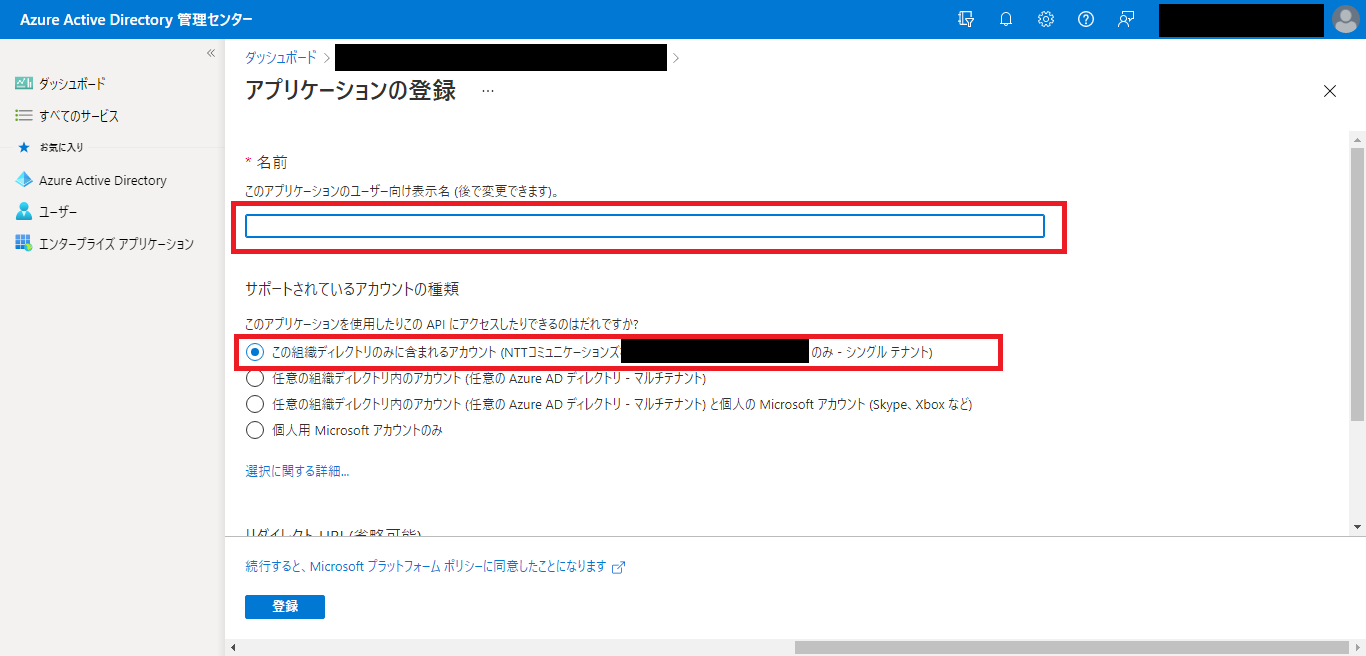
- 「アプリケーションの登録」ページで、「名前」と「サポートされているアカウントの種類」を設定します。「サポートされているアカウントの種類」ではこの組織ディレクトリのみに含まれるアカウント(「使用しているドメイン」のみ - シングル テナント)オプションを選択します。[登録]をクリックします。
- アプリケーションが登録されたことを確認します。今後使用するために、アプリケーション(クライアント)ID をコピーしてテキストエディタなどで保存します。
Azureアプリケーションへグローバル管理者権限を割り当てる
- PowerShell スクリプト 「AssignGlobalAdminRoleToADApplication.ps1」 をダウンロードします。
- 管理者権限を持つユーザーにて、「AssignGlobalAdminRoleToADApplication.ps1」を右クリックし、[PowerShellで実行]をクリックします。役割を手動で割り当てる場合は、以下サイトをご参照ください。
コマンド パイプライン位置 1 のコマンドレット AssignGlobalAdminRoleToADApplication.ps1
次のパラメーターに値を指定してください:
appId: ※「Azure Active Directory 管理センターでのアプリケーションの登録」にてコピーしたアプリケーション(クライアント)ID を入力。
Checking PowerShell version
Setting the [Net.SecurityProtocolType]::Tls12.
Installing Nuget package

Name                           Version          Source           Summary
----                           -------          ------           -------
nuget                          2.8.5.208        https://onege... NuGet provider for the OneGet meta-package manager
Installation of the NuGet Package is successful
Installing PowerShellGet
警告: The version '1.4.7' of module 'PackageManagement' is currently in use. Retry the operation after closing the
applications.
Installation of the PowerShellGet Module is successful
Installing AzureAD
Installation of the AzureAD Module is successful

Account      : ※バックアップアカウント名
Environment  : AzureCloud
Tenant       : ※テナントID
TenantId     : ※テナントID
TenantDomain : ※テナントドメイン名

Check if the application is exists in the tenant or not, Application ID
※appIdで入力したアプリケーション(クライアント)ID
 Successfully retrieve the application details with application ID
※appIdで入力したアプリケーション(クライアント)ID
アプリケーション偽装の役割を割り当てる
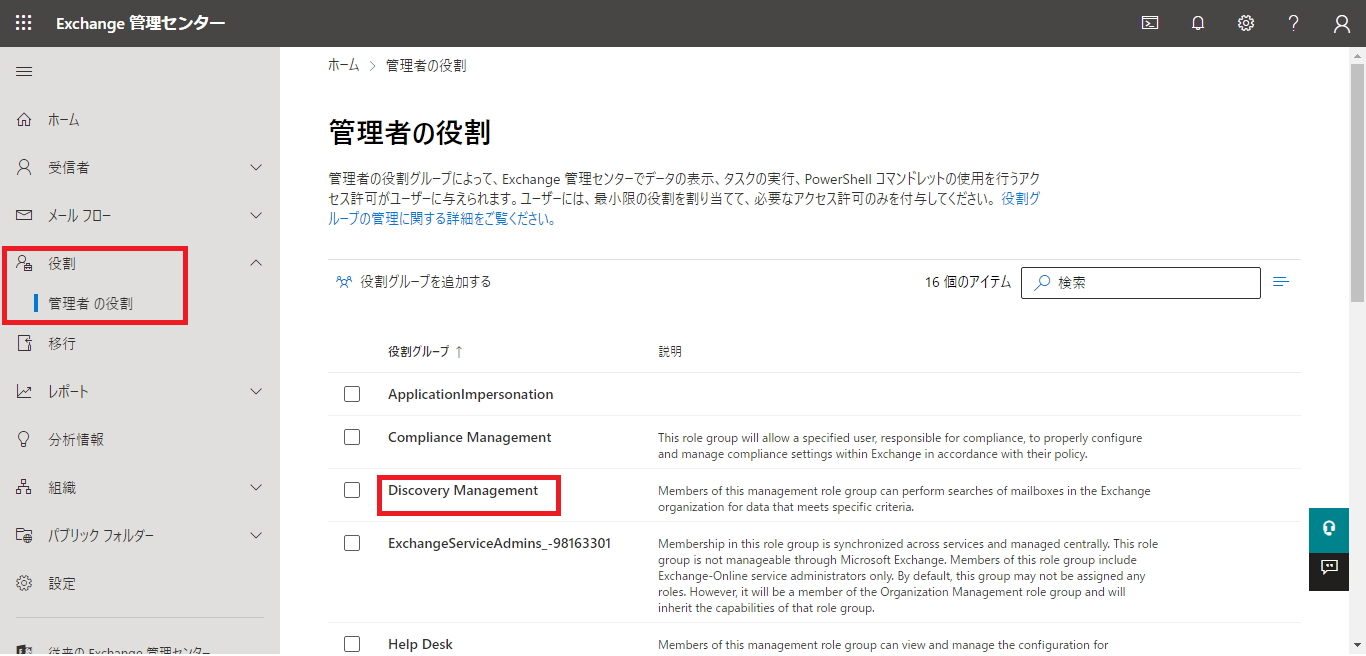
- 管理者またはグローバル管理者権限のあるアカウントでM365ポータルにログインし、Exchange管理センターを開きます。
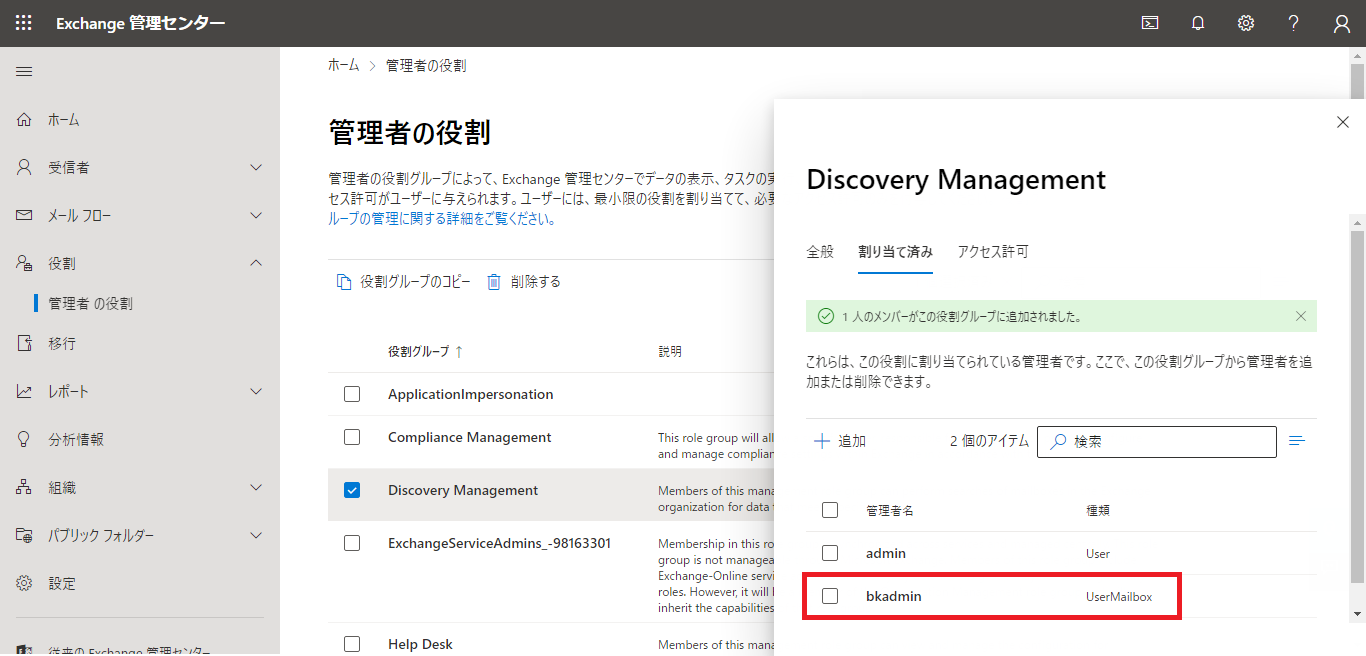
- [役割]>[管理者の役割]に移動し、[Discovery Management]をダブルクリックします。※「Discovery Management」役割グループのメンバは、特定の基準を満たすデータを Exchange 組織のメールボックスで検索できます。
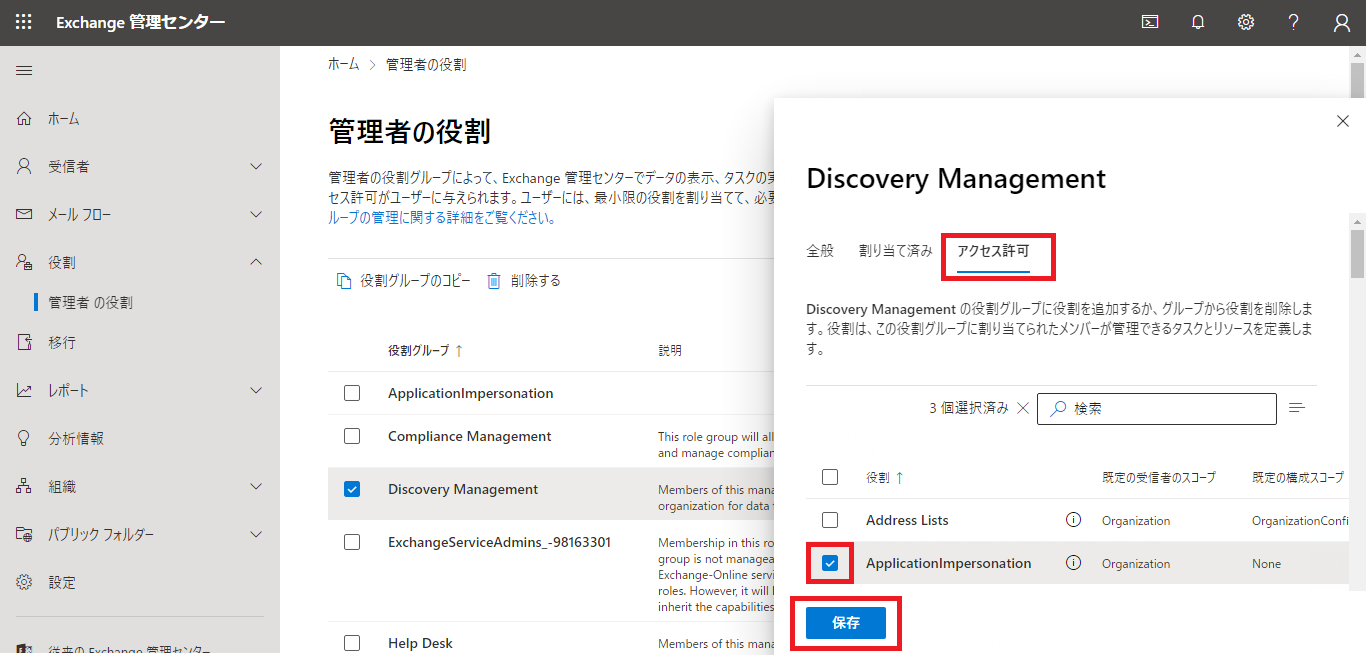
- [アクセス許可]タブをクリックし、[ApplicationImpersonation]を選択後、[保存]をクリックします。
- [割り当て済み]タブをクリックし、[+]をクリックします。
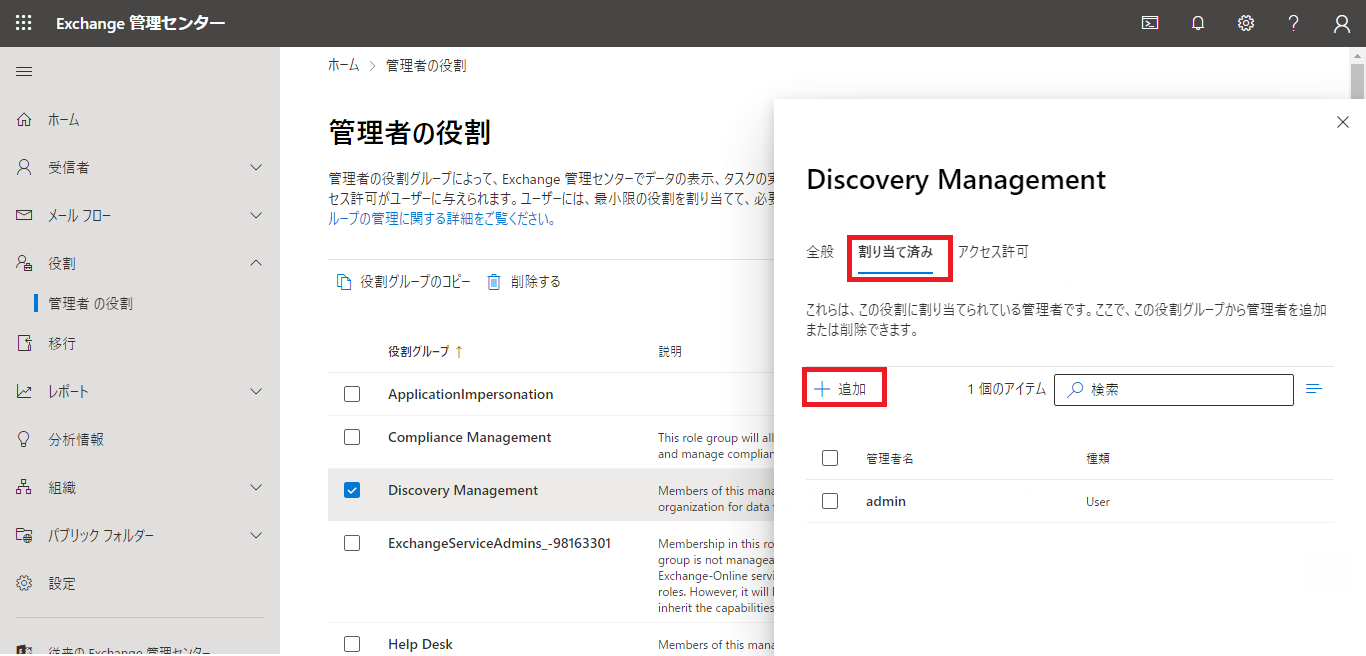
- 検索欄にてバックアップアカウントを選択後、[追加]をクリックしてメンバーを追加します。
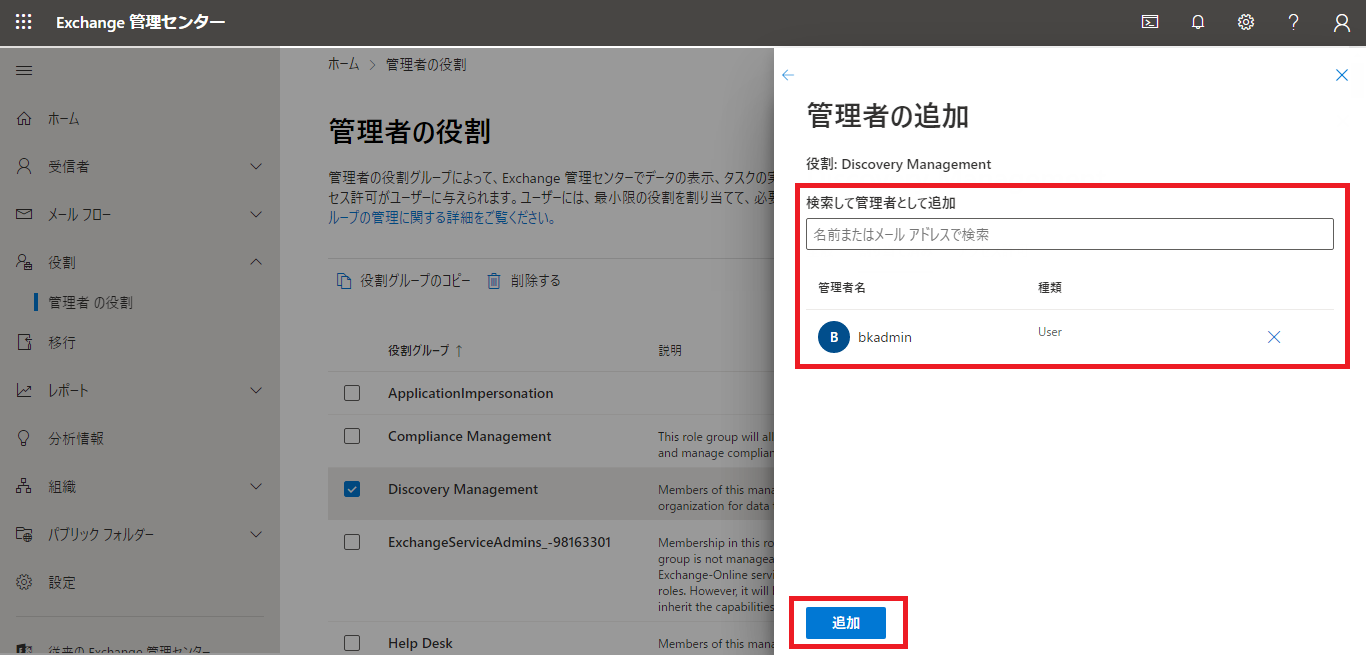
- 選択したバックアップアカウントが表示されたことを確認します。