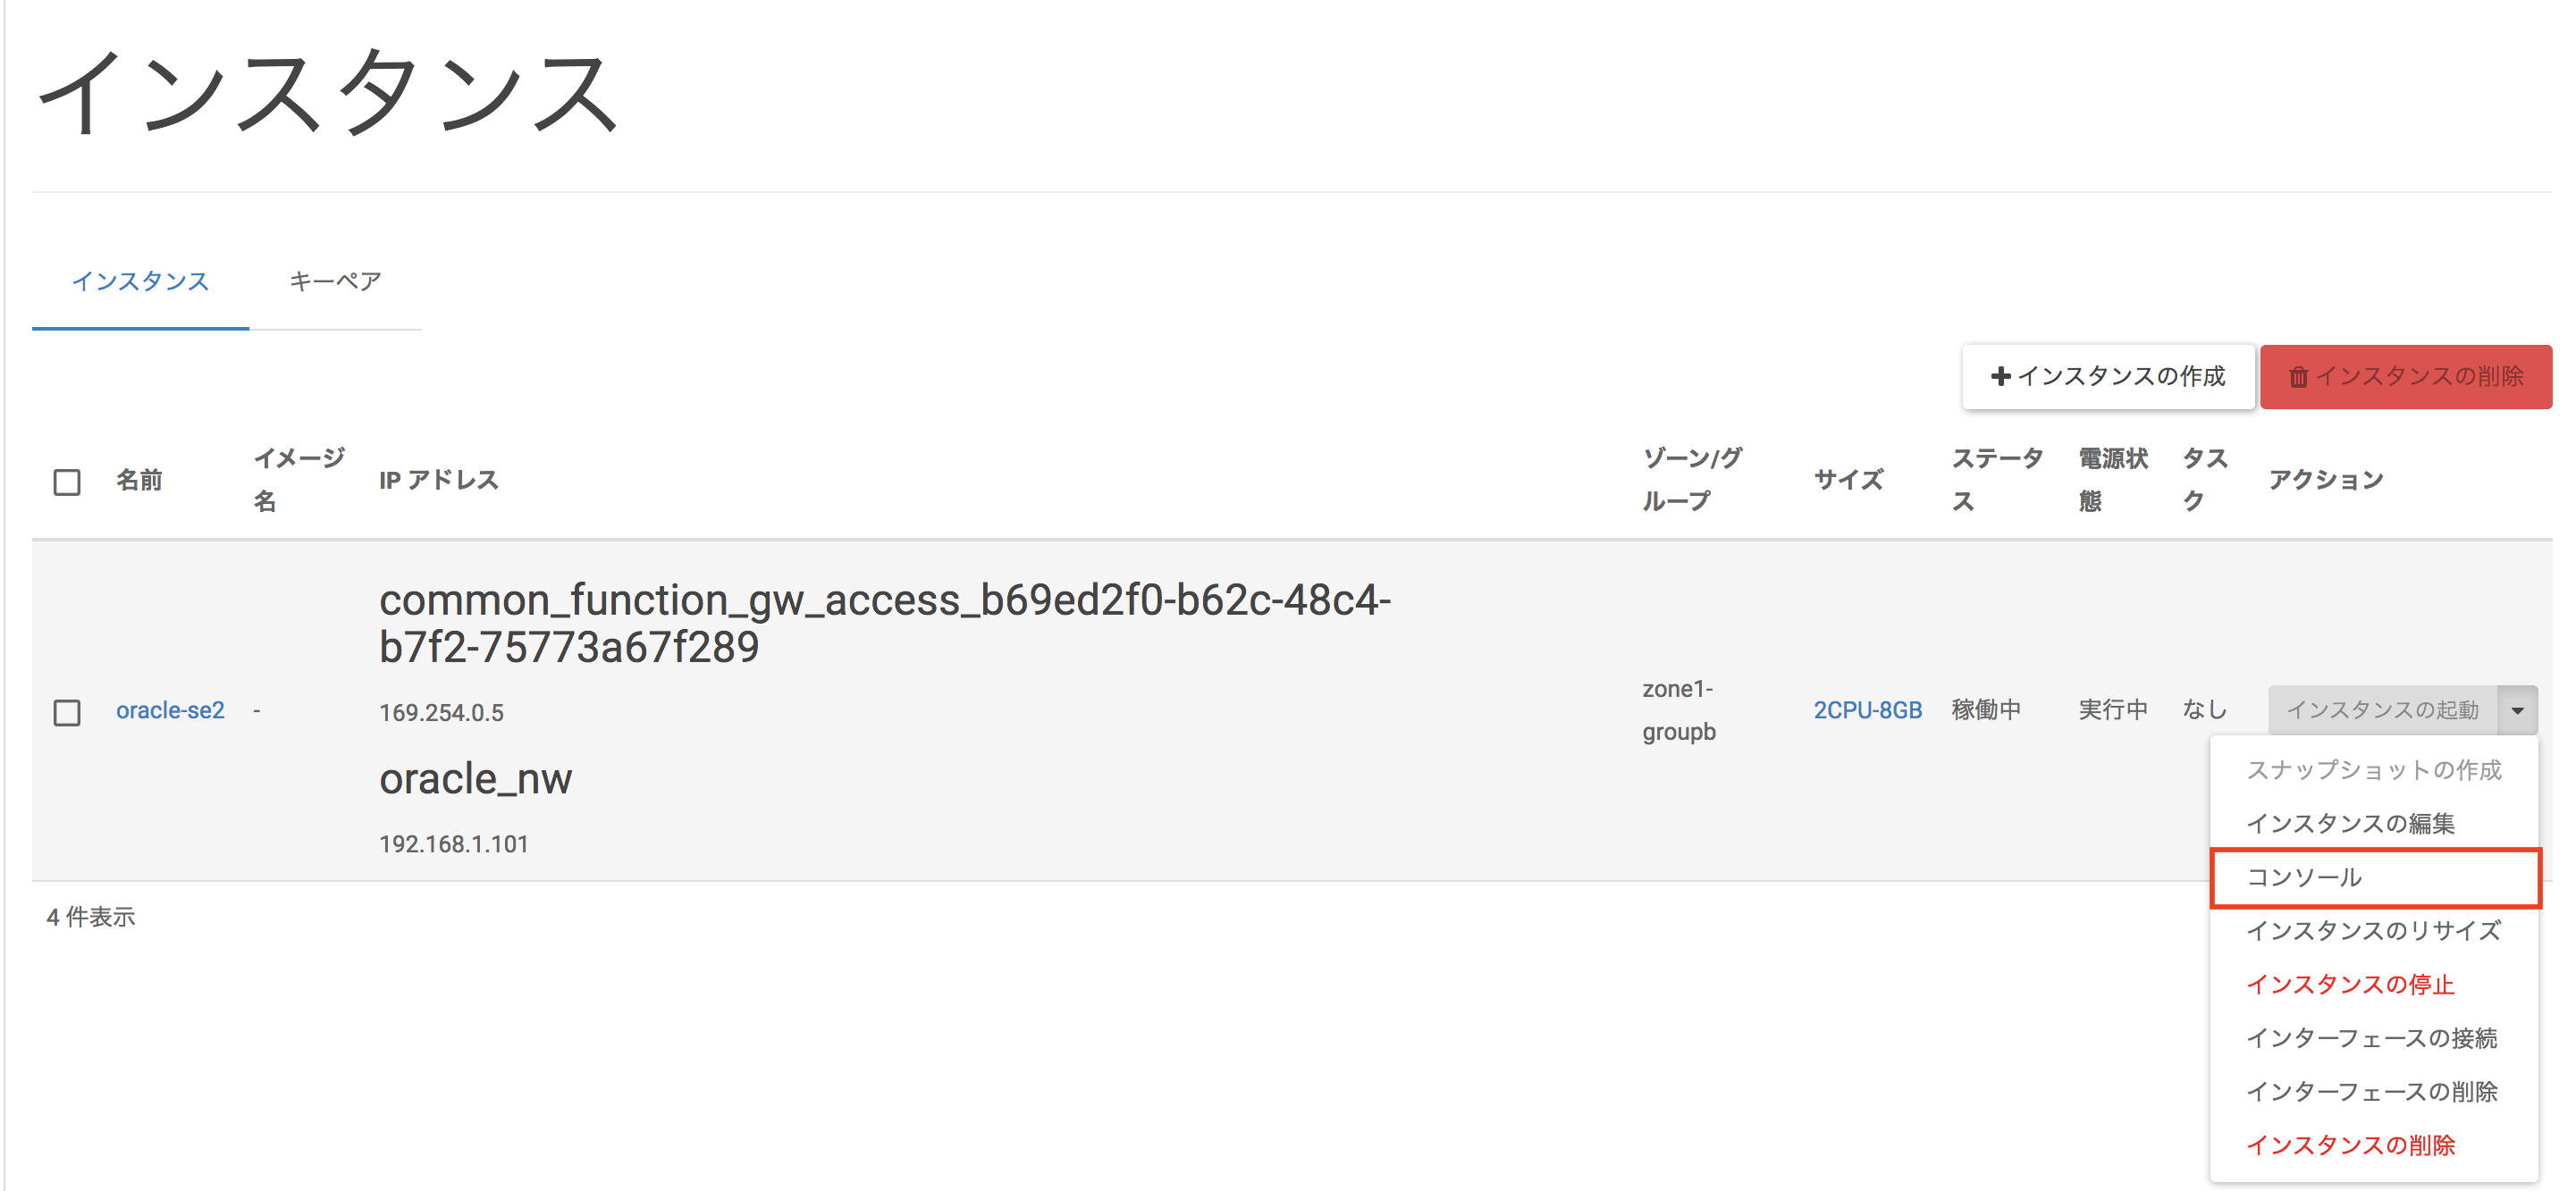
2.3. OS設定
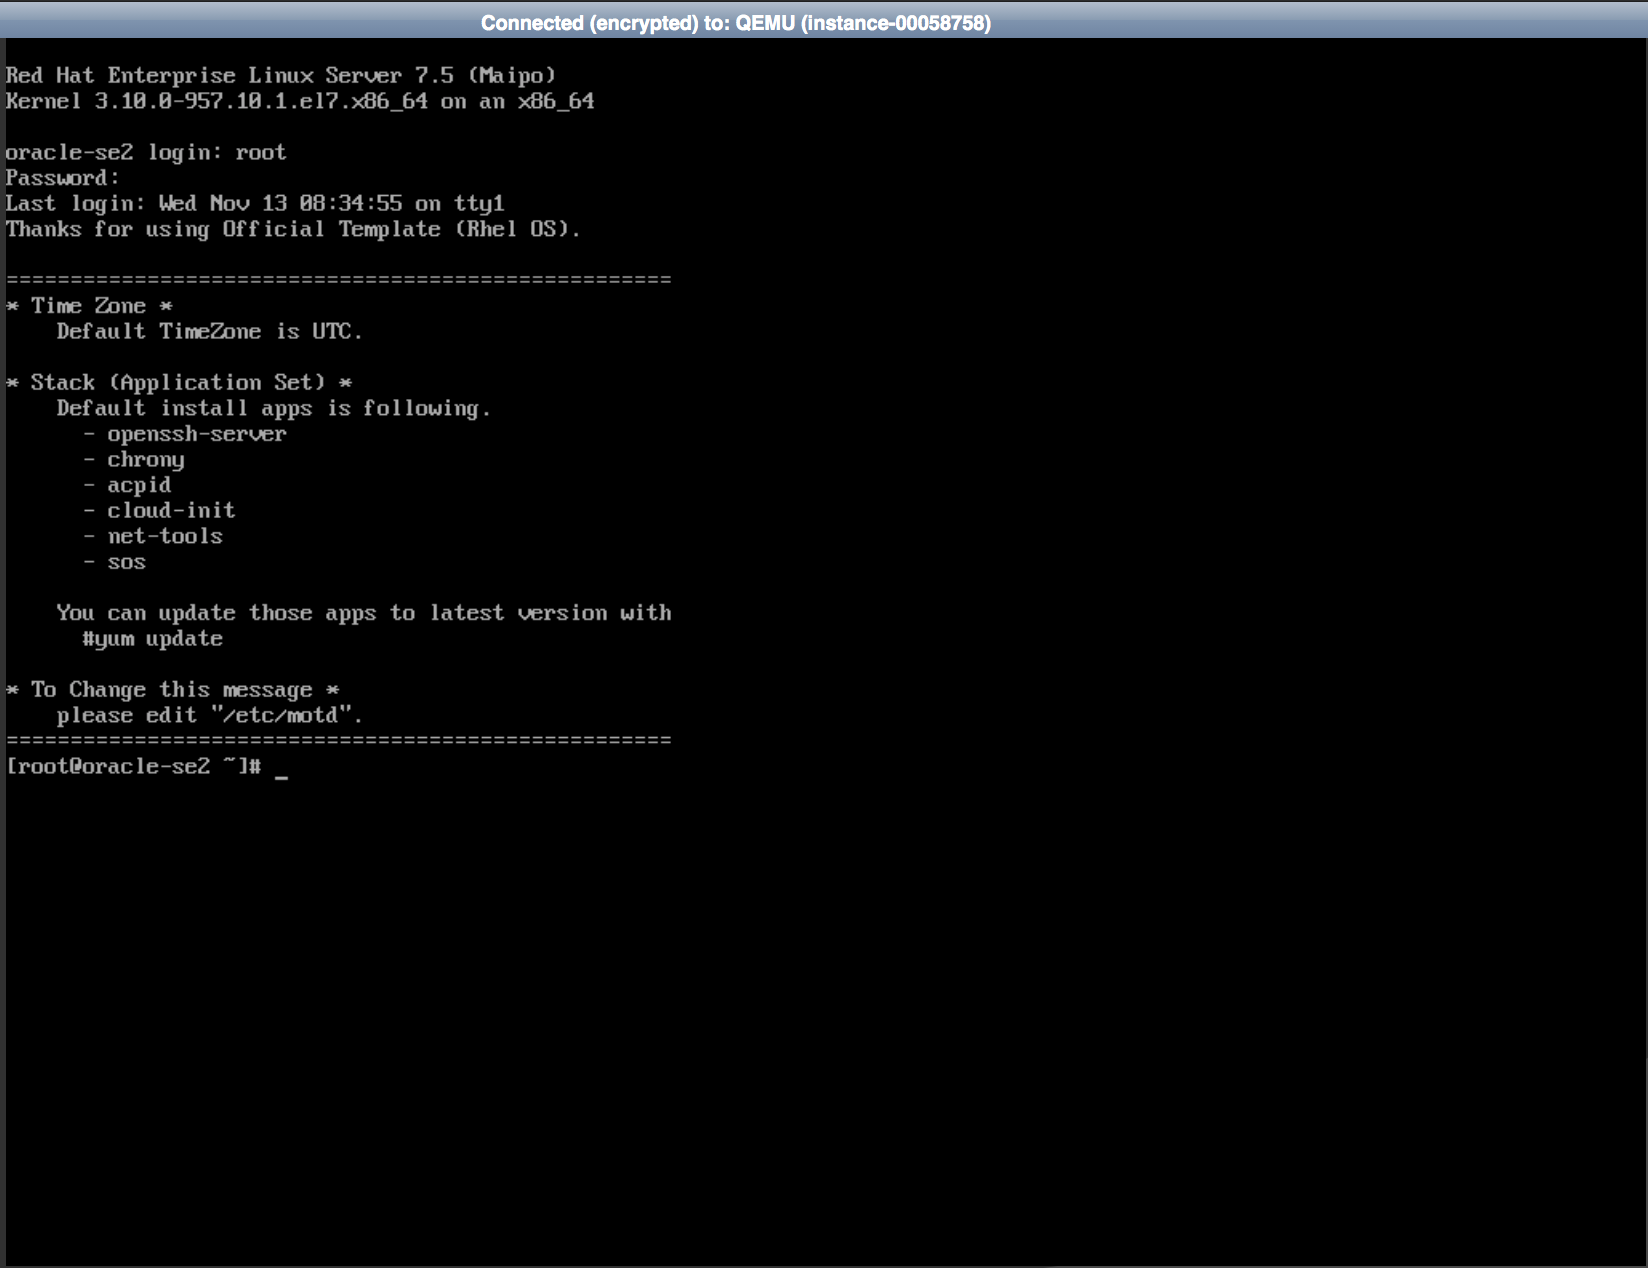
2.3.1. ログイン
注釈
接続するNWによって、VM作成時に指定したインスタンス名が反映されていない場合があります。 詳しくは こちら をご確認下さい。
以下の値を入力し、ログインします。
項目 |
設定値 |
ユーザー名 |
root |
パスワード |
rootユーザー初期パスワード※ |
2.3.2. ネットワークインターフェイス設定
本書では、以下のネットワークインターフェイスを設定します。
インターフェイス |
IPアドレス |
自動起動 |
起動プロトコル |
DNSサーバーのIPアドレス |
デフォルトゲートウェイ |
eth0 |
192.168.1.101 |
Yes |
Manual |
お客様ご利用のDNSサーバーのIPアドレス |
192.168.1.254 |
eth1 |
DHCP自動割当 |
Yes |
Auto |
- |
- |
以下のコマンドを実行し、ネットワークインターフェイス接続名を設定します。
# nmcli c m "System eth0" connection.id eth0
以下のコマンドを実行し、IPアドレスを設定します。
# nmcli c m eth0 ipv4.address 192.168.1.101/24
以下のコマンドを実行し、ネットワークインターフェイスの自動起動を設定します。
# nmcli c m eth0 connection.autoconnect yes
以下のコマンドを実行し、IPアドレスの割り当て方法(手動)を設定します。
# nmcli c m eth0 ipv4.method manual
# nmcli c m eth0 ipv4.dns <DNSサーバーのIPアドレス>
以下のコマンドを実行し、デフォルトゲートウェイを設定します。
# nmcli c m eth0 ipv4.gateway 192.168.1.254
以下のコマンドを実行し、ネットワークインターフェイスの再起動を行います。
# nmcli c down eth0; nmcli c up eth0
以下のコマンドを実行し、IPアドレスが正しく設定されている事を確認します。
# nmcli c show eth0 | grep IP4.ADDRESS
IP4.ADDRESS[1]:                         192.168.1.101/24
以下のコマンドを実行し、ネットワークインターフェイスの自動起動が正しく設定されている事を確認します。
# nmcli c show eth0 | grep connection.autoconnect
connection.autoconnect:                 yes
connection.autoconnect-priority:        0
以下のコマンドを実行し、IPアドレスの割り当て方法(手動)が正しく設定されている事を確認します。
# nmcli c show eth0 | grep ipv4.method
ipv4.method:                            manual
以下のコマンドを実行し、DNSサーバーのIPアドレス指定が正しく設定されている事を確認します。
# nmcli c show eth0 | grep ipv4.dns
ipv4.dns:                               <お客様ご利用のDNSサーバーのIPアドレス>
ipv4.dns-search:
以下のコマンドを実行し、デフォルトゲートウェイが正しく設定されている事を確認します。
# nmcli c show eth0 | grep ipv4.gateway
ipv4.gateway:                           192.168.1.254
以下のコマンドを実行し、ネットワークインターフェイスを追加します。
# nmcli c add type ethernet ifname eth1 con-name eth1
以下のコマンドを実行し、IPアドレスが正しく設定されている事を確認します。
# nmcli c show eth1 | grep IP4.ADDRESS
IP4.ADDRESS[1]:                         169.254.0.15/17
以下のコマンドを実行し、ネットワークインターフェイスの自動起動が正しく設定されている事を確認します。
# nmcli c show eth1 | grep connection.autoconnect
connection.autoconnect:                 yes
connection.autoconnect-priority:        0
以下のコマンドを実行し、IPアドレスの割り当て方法(手動)が正しく設定されている事を確認します。
# nmcli c show eth1 | grep ipv4.method
ipv4.method:                            auto
以下のコマンドを実行し、デフォルトゲートウェイが正しく設定されている事を確認します。
# nmcli c show eth1 | grep ipv4.gateway
ipv4.gateway:                           --
2.3.3. SSHログイン設定
以下のコマンドを実行し、SSHログインを設定します。
# vi /etc/ssh/sshd_config
...省略...
PasswordAuthentication yes
...省略...
(変更後は、ZZコマンドにて変更内容を保存し、viを終了)
以下のコマンドを実行し、sshdを再起動します。
# systemctl restart sshd
2.3.4. ホスト名設定
本書では、以下のホスト名を設定します。
項目 |
設定値 |
ホスト名 |
oracle-se2.example.com |
以下のコマンドを実行し、ホスト名を設定します。
# nmcli general hostname oracle-se2.example.com
以下のコマンドを実行し、ホスト名が正しく設定されている事を確認します。
# hostname
oracle-se2.example.com
2.3.5. ホスト名の名前解決
以下のコマンドを実行し、ホスト名の名前解決を設定します。
# vi /etc/hosts
...省略...
192.168.1.101 oracle-se2.example.com oracle-se2 # 追加
注釈
hostsファイルには「インスタンスの作成」画面で入力したインスタンス名ではなく、hostnameコマンドで確認したホスト名をそのまま入力してください。 大文字・小文字の違いによりDB作成時にエラーが発生する恐れがあります。
以下のコマンドを実行し、ホスト名の名前解決が正しく設定されている事を確認します。
# ping -c 3 oracle-se2
PING oracle-se2.example.com (192.168.1.101) 56(84) bytes of data.
64 bytes from oracle-se2.example.com (192.168.1.101): icmp_seq=1 ttl=64 time=0.019 ms
64 bytes from oracle-se2.example.com (192.168.1.101): icmp_seq=2 ttl=64 time=0.044 ms
64 bytes from oracle-se2.example.com (192.168.1.101): icmp_seq=3 ttl=64 time=0.038 ms

--- oracle-se2.example.com ping statistics ---
3 packets transmitted, 3 received, 0% packet loss, time 1999ms
rtt min/avg/max/mdev = 0.019/0.033/0.044/0.012 ms
2.3.6. cloud-initによる自動設定の一部無効化
以下のコマンドを実行し、cloud-initによる自動設定の一部無効化を設定します。
# vi /etc/cloud/cloud.cfg
...省略...
ssh_pwauth:   true        # 変更
preserve_hostname: true   # 変更
...省略...
manage_etc_hosts: false   # 変更
...省略...
以下のコマンドを実行し、OSを再起動します。
# reboot
以下のコマンドを実行し、SSHログイン設定が正しく設定されている事を確認します。
# grep ^PasswordAuthentication /etc/ssh/sshd_config
PasswordAuthentication yes
以下のコマンドを実行し、ホスト名が正しく設定されている事を確認します。
# hostname
oracle-se2.example.com
以下のコマンドを実行し、ホスト名の名前解決が正しく設定されている事を確認します。
# cat /etc/hosts
...省略...
192.168.1.101 oracle-se2.example.com oracle-se2
2.3.7. tmpfs設定
本書では、以下のtmpfsを設定します。
項目 |
設定値 |
tmpfsサイズ |
16GB |
以下のコマンドを実行し、tmpfsのサイズを設定します。
# vi /etc/fstab
tmpfs /dev/shm tmpfs defaults,size=16G 0 0
以下のコマンドを実行し、OSを再起動します。
# reboot
以下のコマンドを実行し、tmpfsのサイズが正しく設定されている事を確認します。
# df -h
Filesystem             Size  Used Avail Use% Mounted on
...省略...
tmpfs                   16G  929M   16G   6% /dev/shm
...省略...
2.3.8. タイムゾーン設定
本書では、以下のタイムゾーンを設定します。
項目 |
設定値 |
タイムゾーン |
Asia/Tokyo |
以下のコマンドを実行し、タイムゾーンを設定します。
# timedatectl set-timezone Asia/Tokyo
以下のコマンドを実行し、タイムゾーンが正しく設定されている事を確認します。
# timedatectl
Local time: 木 2016-03-24 16:33:23 JST
Universal time: 木 2016-03-24 07:33:23 UTC
RTC time: 木 2016-03-24 07:33:22
Timezone: Asia/Tokyo (JST, +0900)
NTP enabled: yes
NTP synchronized: yes
RTC in local TZ: no
DST active: n/a
2.3.9. Database用ボリュームのマウント
本書では、以下のDatabase用ボリュームをマウントします。
項目 |
設定値 |
デバイスパス |
/dev/vdb※1 |
ファイルシステム |
XFS※2 |
# parted /dev/vdb

GNU Parted 3.1
Using /dev/vdb
Welcome to GNU Parted! Type 'help' to view a list of commands.

(parted) print
Error: /dev/vdb: unrecognised disk label
Model: Virtio Block Device (virtblk)
Disk /dev/vdb: 3299GB
Sector size (logical/physical): 512B/512B
Partition Table: unknown
Disk Flags:
以下のコマンドを実行し、パーティションを作成します。
# parted /dev/vdb
...省略...
(parted) mklabel gpt

(parted) print
Model: Virtio Block Device (virtblk)
Disk /dev/vdb: 3299GB
Sector size (logical/physical): 512B/512B
Partition Table: gpt
Disk Flags:

Number  Start  End  Size  File system  Name  Flags

(parted) mkpart primary xfs 0 -0
Warning: The resulting partition is not properly aligned for best performance.
Ignore/Cancel? Ignore

(parted) print
Model: Virtio Block Device (virtblk)
Disk /dev/vdb: 3299GB
Sector size (logical/physical): 512B/512B
Partition Table: gpt
Disk Flags:

Number  Start   End    Size   Type     File system  Flags
1       1049kB  107GB  107GB  primary  xfs

(parted) quit
Information: You may need to update /etc/fstab.
以下のコマンドを実行し、作成したパーティションを確認します。
# ls -l /dev/vdb*
brw-rw---- 1 root disk 253, 16 Feb  9 10:58 /dev/vdb
brw-rw---- 1 root disk 253, 17 Feb  9 10:58 /dev/vdb1
以下のコマンドを実行し、作成したパーティションにファイルシステムを作成します。
# mkfs.xfs /dev/vdb1
meta-data=/dev/vdb1              isize=256    agcount=4, agsize=201326590 blks
         =                       sectsz=512   attr=2, projid32bit=1
         =                       crc=0        finobt=0
data     =                       bsize=4096   blocks=805306359, imaxpct=5
         =                       sunit=0      swidth=0 blks
naming   =version 2              bsize=4096   ascii-ci=0 ftype=0
log      =internal log           bsize=4096   blocks=393215, version=2
         =                       sectsz=512   sunit=0 blks, lazy-count=1
realtime =none                   extsz=4096   blocks=0, rtextents=0
以下のコマンドを実行し、マウントポイントを作成します。
# mkdir /u01
以下のコマンドを実行し、Database用ボリュームをマウントします。
# mount /dev/vdb1 /u01
以下のコマンドを実行し、Database用ボリュームが正しく認識されている事を確認します。
# df -h
dev/mapper/ol-root    24G   13G   12G   54% /
devtmpfs              3.9G     0  3.9G    0% /dev
tmpfs                 3.9G     0  3.9G    0% /dev/shm
tmpfs                 3.9G  8.7M  3.9G    1% /run
tmpfs                 3.9G     0  3.9G    0% /sys/fs/cgroup
/dev/vda1             497M  143M  355M   29% /boot
/dev/vdb1             100G   33M  100G    1% /u01
# ls /dev/disk/by-uuid/ -l
total 0
lrwxrwxrwx 1 root root 10 Mar  3 16:54 3ebb1ff0-0950-4322-b1d1-cb0462950835 -> ../../dm-2
lrwxrwxrwx 1 root root 10 Mar  3 16:16 5a1cef15-d3e3-4388-bba7-fac730a67e7b -> ../../dm-0
lrwxrwxrwx 1 root root 10 Mar  3 16:16 659ba742-f9bf-4134-839a-5bcf3619ffd2 -> ../../dm-1
lrwxrwxrwx 1 root root 10 Mar  3 16:16 7c414fe9-bec3-402b-8d01-323e746aa5bf -> ../../vda1
lrwxrwxrwx 1 root root 10 Mar  3 16:37 f7d714dd-205b-46ca-875a-735ccdbc1874 -> ../../vdb1

# vi /etc/fstab
...省略...
UUID=f7d714dd-205b-46ca-875a-735ccdbc1874 /u01 xfs defaults 0 0 # 追加
2.3.10. NTPサーバーのIPアドレス指定
本書では、以下のNTPサーバーのIPアドレスを指定します。
項目 |
設定値 |
NTPサーバーのIPアドレス |
お客様ご利用のNTPサーバーのIPアドレス※ |
以下のコマンドを実行し、NTP サーバーのIPアドレスを指定します。 共通機能ゲートウェイの NTP サーバーを利用する場合、設定不要です。
# vi /etc/chrony.conf
# These servers were defined in the installation:
# server 169.254.127.1 iburst # コメントアウト
server <NTPサーバーのIPアドレス> iburst # 追加
# Use public servers from the pool.ntp.org project.
# Please consider joining the pool (http://www.pool.ntp.org/join.html).

...省略...
以下のコマンドを実行し、サービスを再起動します。 共通機能ゲートウェイの NTP サーバーを利用する場合、設定不要です。
# systemctl restart chronyd
以下のコマンドを実行し、NTP サーバーの IP アドレスが正しく指定されている事を確認します。
# chronyc sources
210 Number of sources = 1
MS Name/IP address Stratum Poll Reach LastRx Last sample
============================================================
^\* <NTPサーバーのIPアドレス> 2 6 17 7 -28us[ +17us] +/- 44ms
2.3.11. グループの作成
本書では、以下のグループを作成します。
グループ名 |
グループID |
oinstall |
2000 |
dba |
2001 |
backupdba |
2002 |
oper |
2003 |
dgdba |
2004 |
kmdba |
2005 |
以下のコマンドを実行し、グループを作成します。
# groupadd -g 2000 oinstall
# groupadd -g 2001 dba
# groupadd -g 2002 backupdba
# groupadd -g 2003 oper
# groupadd -g 2004 dgdba
# groupadd -g 2005 kmdba
2.3.12. Oracleユーザーの作成
本書では、以下のユーザーを作成します。
ユーザー名 |
ユーザーID |
パスワード |
プライマリグループ |
セカンダリグループ |
oracle |
2000 |
お客様指定パスワード |
oinstall |
dba,oper,backupdba,dgdba,kmdba |
以下のコマンドを実行し、oracleユーザーを作成します。
# useradd --uid 2000 --gid oinstall --groups dba,oper,backupdba,dgdba,kmdba oracle
以下のコマンドを実行し、oracleユーザーのパスワードを設定します。
# passwd oracle
Changing password for user oracle.
New password:
Retype new password:
2.3.13. ユーザーリソース制限
本書では、以下のユーザーリソース制限を設定します。
ユーザー名 |
制限リソース |
ソフト制限 |
ハード制限 |
oracle |
nproc |
2047 |
16384 |
oracle |
nofile |
1024 |
65536 |
oracle |
stack |
10240 |
32768 |
以下のコマンドを実行し、ユーザーリソース制限を設定します。
# vi /etc/security/limits.d/99-oracle-limits.conf
oracle soft nproc 2047
oracle hard nproc 16384
oracle soft nofile 1024
oracle hard nofile 65536
oracle soft stack 10240
oracle hard stack 32768
以下のコマンドを実行し、ユーザーリソース制限が正しく設定されている事を確認します。
# su - oracle
$ ulimit -Sa
core file size          (blocks, -c) 0
data seg size           (kbytes, -d) unlimited
scheduling priority             (-e) 0
file size               (blocks, -f) unlimited
pending signals                 (-i) 31471
max locked memory       (kbytes, -l) 64
max memory size         (kbytes, -m) unlimited
open files                      (-n) 1024
pipe size            (512 bytes, -p) 8
POSIX message queues     (bytes, -q) 819200
real-time priority              (-r) 0
stack size              (kbytes, -s) 10240
cpu time               (seconds, -t) unlimited
max user processes              (-u) 2047
virtual memory          (kbytes, -v) unlimited
file locks                      (-x) unlimited

$ ulimit -Ha
core file size          (blocks, -c) unlimited
data seg size           (kbytes, -d) unlimited
scheduling priority             (-e) 0
file size               (blocks, -f) unlimited
pending signals                 (-i) 31471
max locked memory       (kbytes, -l) 64
max memory size         (kbytes, -m) unlimited
open files                      (-n) 65536
pipe size            (512 bytes, -p) 8
POSIX message queues     (bytes, -q) 819200
real-time priority              (-r) 0
stack size              (kbytes, -s) 32768
cpu time               (seconds, -t) unlimited
max user processes              (-u) 16384
virtual memory          (kbytes, -v) unlimited
file locks                      (-x) unlimited
2.3.14. Oracleインストーラーの所有者変更
本書では、以下のOracleインストーラーの所有者を変更します。
項目 |
設定値 |
インストーラーパス |
/software/* |
所有ユーザー |
oracle |
所有グループ |
oinstall |
以下のコマンドを実行し、Oracleインストーラーの所有者を変更します。
# chown -R oracle:oinstall /software/*
以下のコマンドを実行し、Oracleインストーラーの所有者が正しく設定されている事を確認します。
# ls -la /software
Total 4370300
drwxr-xr-x. 2 root root 4096 4/7 10:31 .
dr-xr-xr-x. 19 root root 4096 4/8 12:14 ..
-rw-r--r--. 1 oracle oinstall 918555219 4/7 10:26 client
-rw-r--r--. 1 oracle oinstall 1673591558 4/7 10:26 database
-rw-r--r--. 1 oracle oinstall 867667463 4/7 10:31 grid
2.3.15. ORACLE_HOMEディレクトリの作成
本書では、以下のORACLE_BASEディレクトリを作成します。
項目 |
設定値 |
ディレクトリパス |
/u01/app/oracle |
以下のコマンドを実行し、ORACLE_HOMEディレクトリを作成します。
# chown -R oracle:oinstall /u01
# su - oracle
$ mkdir -p /u01/app/oracle/product/19.0.0/dbhome_1
$ chgrp oinstall /u01/app/oracle/product/19.0.0/dbhome_1
2.3.16. Oracleインストーラーの展開
本書では、以下のOracleインストーラーを展開します。
項目 |
設定値 |
ディレクトリパス |
/software/database/V982063-01.zip |
所有ユーザー |
oracle |
所有グループ |
oinstall |
以下のコマンドを実行し、Oracleインストーラーを展開します。
$ cd /u01/app/oracle/product/19.0.0/dbhome_1
$ unzip -q /software/database/V982063-01.zip
以下のコマンドを実行し、Oracleインストーラーが正しく展開(コピー)されている事を確認します。
$ ls /u01/app/oracle/product/19.0.0/dbhome_1
addnode     dbjava       hs             md       ords     rdbms          sqlj
apex        dbs          install        mgw      oss      relnotes       sqlpatch
assistants  deinstall    instantclient  network  oui      root.sh        sqlplus
bin         demo         inventory      nls      owm      root.sh.old    srvm
clone       diagnostics  javavm         odbc     perl     root.sh.old.1  suptools
crs         dmu          jdbc           olap     plsql    runInstaller   ucp
css         drdaas       jdk            OPatch   precomp  schagent.conf  usm
ctx         dv           jlib           opmn     QOpatch  sdk            utl
cv          env.ora      ldap           oracore  R        slax           wwg
data        has          lib            ord      racg     sqldeveloper   xdk


