1.3. OS設定
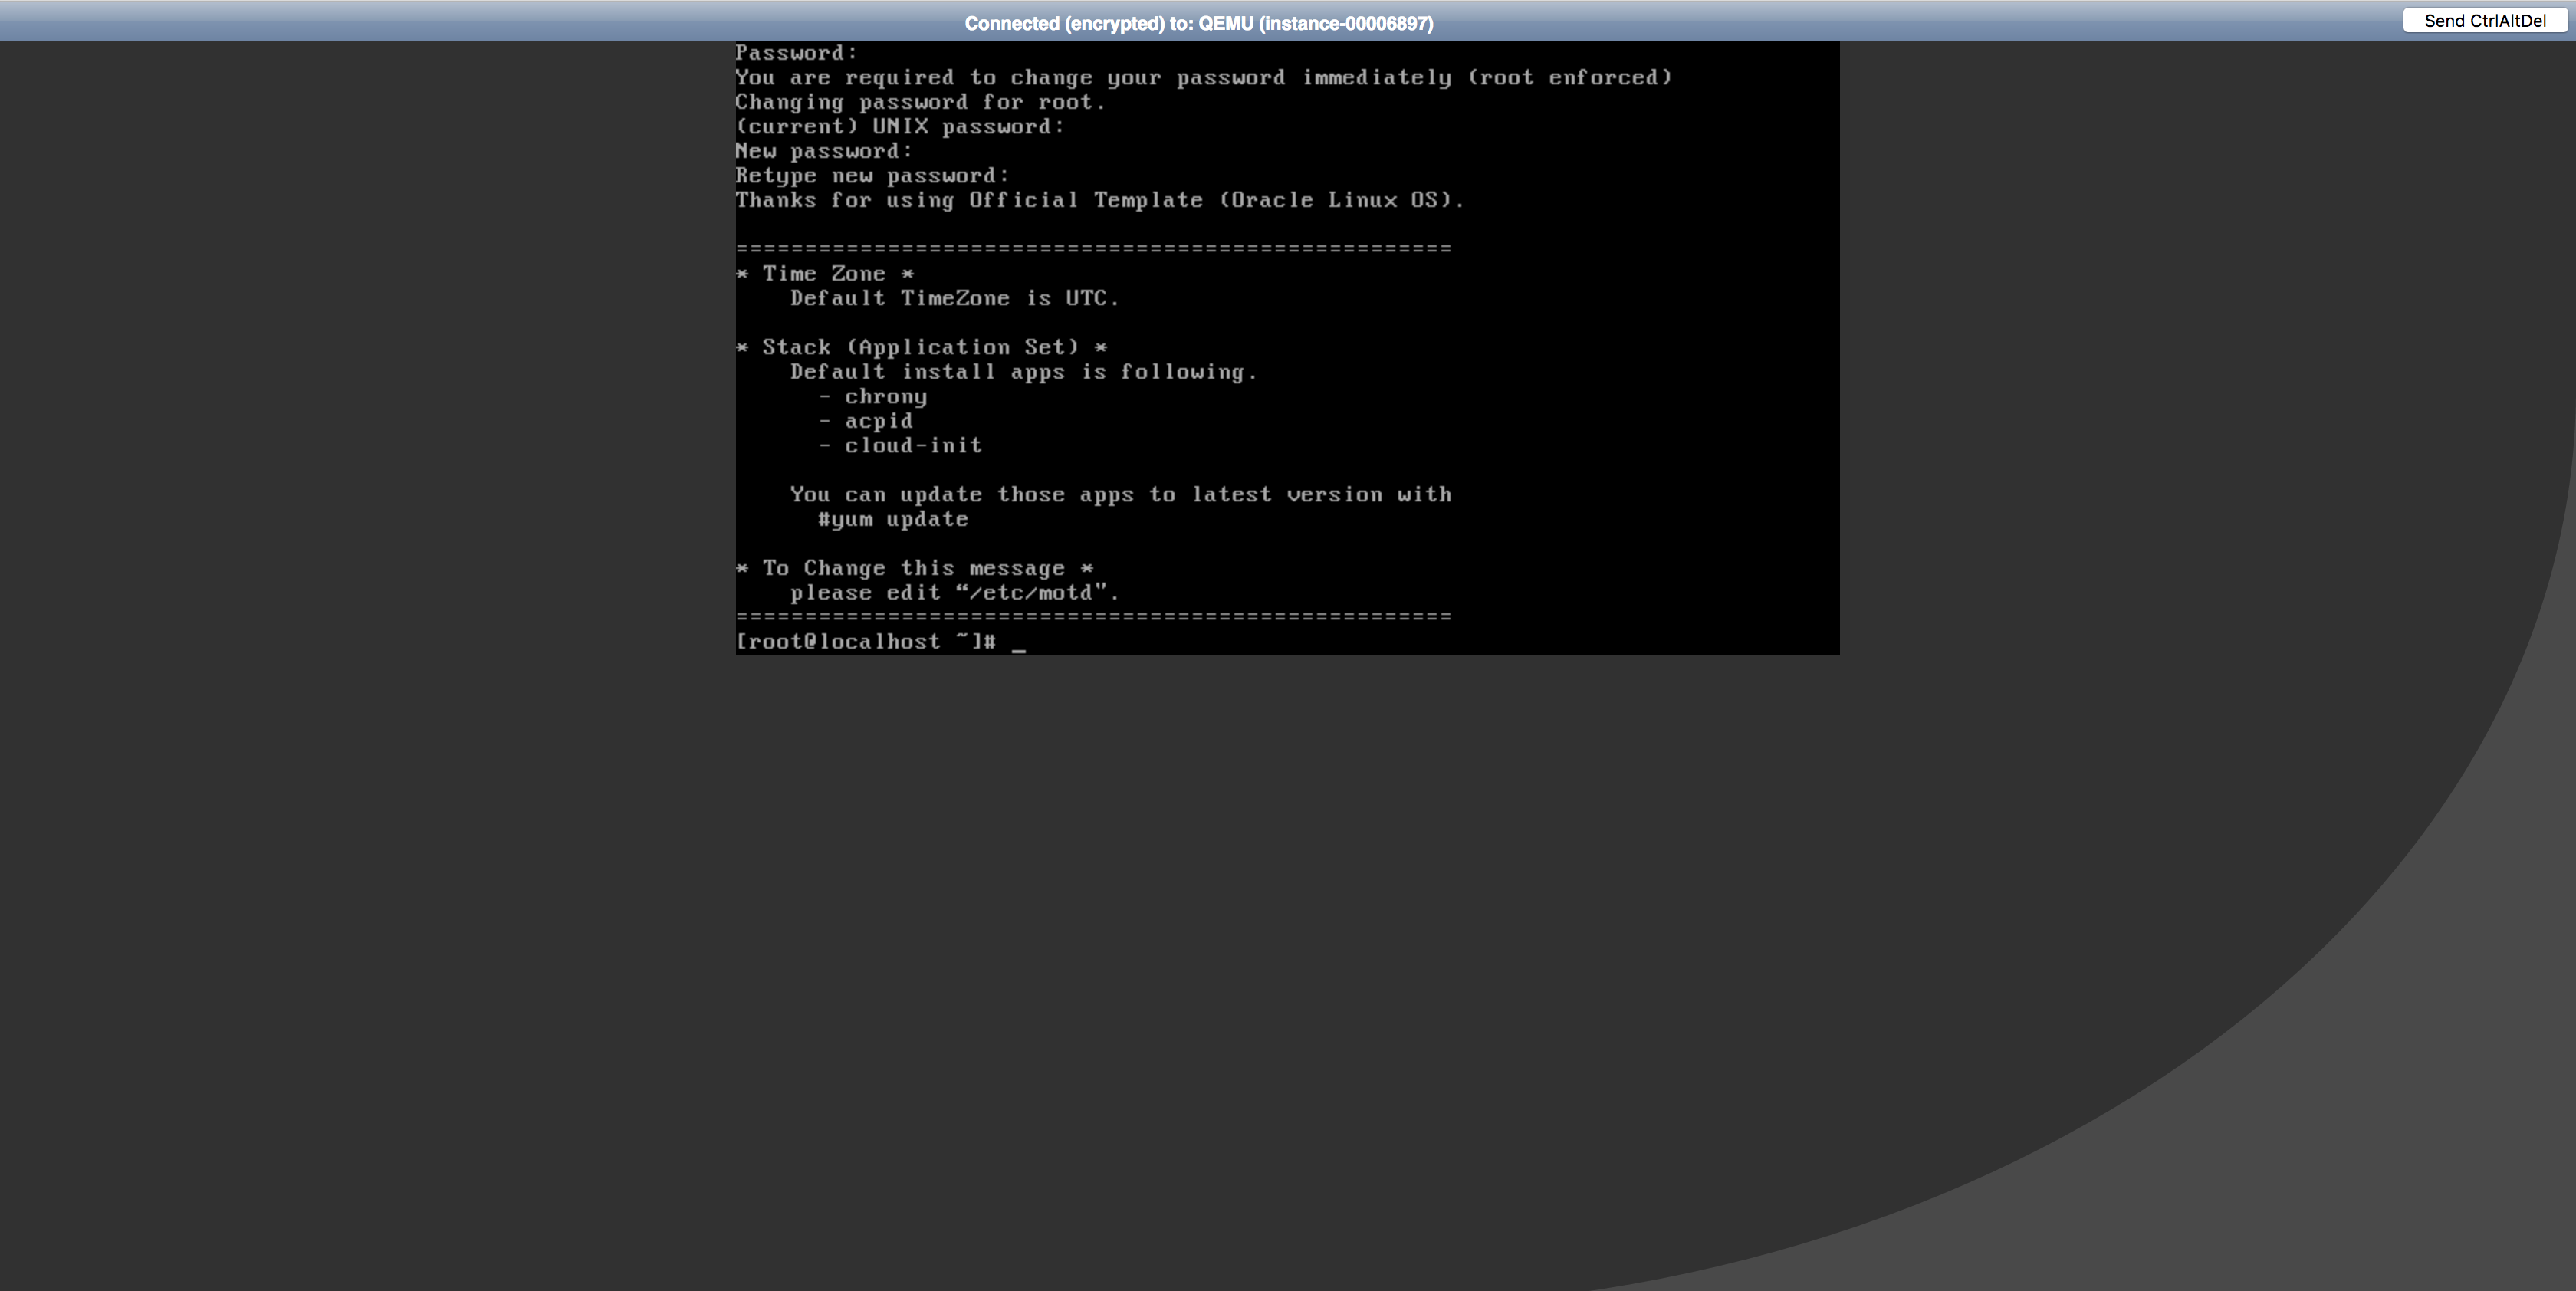
1.3.1. ログイン
以下の値を入力し、ログインします。
項目 |
設定値 |
ユーザー名 |
root |
パスワード |
rootユーザー初期パスワード※ |
1.3.2. ネットワークインターフェイス設定
本書では、以下のネットワークインターフェイスを設定します。
インターフェイス |
IPアドレス |
自動起動 |
起動プロトコル |
DNSサーバーのIPアドレス |
デフォルトゲートウェイ |
eth0 |
192.168.1.101 |
Yes |
Manual |
お客様ご利用のDNSサーバーのIPアドレス |
192.168.1.254 |
eth1 |
DHCP自動割当 |
Yes |
Auto |
- |
- |
以下のコマンドを実行し、ネットワークインターフェイス接続名を設定します。
# nmcli c m "System eth0" connection.id eth0
以下のコマンドを実行し、IPアドレスを設定します。
# nmcli c m eth0 ipv4.address 192.168.1.101/24
以下のコマンドを実行し、ネットワークインターフェイスの自動起動を設定します。
# nmcli c m eth0 connection.autoconnect yes
以下のコマンドを実行し、IPアドレスの割り当て方法(手動)を設定します。
# nmcli c m eth0 ipv4.method manual
# nmcli c m eth0 ipv4.dns <DNSサーバーのIPアドレス>
以下のコマンドを実行し、デフォルトゲートウェイを設定します。
# nmcli c m eth0 ipv4.gateway 192.168.1.254
以下のコマンドを実行し、ネットワークインターフェイスの再起動を行います。
# nmcli c down eth0; nmcli c up eth0
以下のコマンドを実行し、IPアドレスが正しく設定されている事を確認します。
# nmcli c show eth0 | grep IP4.ADDRESS
IP4.ADDRESS[0]:                         192.168.1.101/24
以下のコマンドを実行し、ネットワークインターフェイスの自動起動が正しく設定されている事を確認します。
# nmcli c show eth0 | grep connection.autoconnect
connection.autoconnect:                 yes
connection.autoconnect-priority:        0
以下のコマンドを実行し、IPアドレスの割り当て方法(手動)が正しく設定されている事を確認します。
# nmcli c show eth0 | grep ipv4.method
ipv4.method:                            manual
以下のコマンドを実行し、DNSサーバーのIPアドレス指定が正しく設定されている事を確認します。
# nmcli c show eth0 | grep ipv4.dns
ipv4.dns:                               <お客様ご利用のDNSサーバーのIPアドレス>
ipv4.dns-search:
以下のコマンドを実行し、デフォルトゲートウェイが正しく設定されている事を確認します。
# nmcli c show eth0 | grep ipv4.gateway
ipv4.gateway:                           192.168.1.254
以下のコマンドを実行し、インターフェイス追加を設定します。
# nmcli c add type ethernet ifname eth1 con-name eth1
以下のコマンドを実行し、IPアドレスが正しく設定されている事を確認します。
# nmcli c show eth1 | grep IP4.ADDRESS
IP4.ADDRESS[1]:                         169.254.0.15/17
以下のコマンドを実行し、ネットワークインターフェイスの自動起動が正しく設定されている事を確認します。
# nmcli c show eth1 | grep connection.autoconnect
connection.autoconnect:                 yes
connection.autoconnect-priority:        0
以下のコマンドを実行し、IPアドレスの割り当て方法(手動)が正しく設定されている事を確認します。
# nmcli c show eth1 | grep ipv4.method
ipv4.method:                            auto
以下のコマンドを実行し、デフォルトゲートウェイが正しく設定されている事を確認します。
# nmcli c show eth1 | grep ipv4.gateway
ipv4.gateway:                           --
1.3.3. SSHログイン設定
以下のコマンドを実行し、SSHログインを設定します。
# vi /etc/ssh/sshd_config
...省略...
PasswordAuthentication yes
...省略...
(変更後は、ZZコマンドにて変更内容を保存し、viを終了)
以下のコマンドを実行し、sshdを再起動します。
# systemctl restart sshd
1.3.4. ホスト名設定
本書では、以下のホスト名を設定します。
項目 |
設定値 |
ホスト名 |
oracle-se2.example.com |
以下のコマンドを実行し、ホスト名を設定します。
# nmcli general hostname oracle-se2.example.com
以下のコマンドを実行し、ホスト名が正しく設定されている事を確認します。
# hostname
oracle-se2.example.com
1.3.5. ホスト名の名前解決
以下のコマンドを実行し、ホスト名の名前解決を設定します。
# vi /etc/hosts
...省略...
192.168.1.101 oracle-se2.example.com oracle-se2 # 追加
以下のコマンドを実行し、ホスト名の名前解決が正しく設定されている事を確認します。
# ping -c 3 oracle-se2
PING oracle-se2.example.com (192.168.1.101) 56(84) bytes of data.
64 bytes from oracle-se2.example.com (192.168.1.101): icmp_seq=1 ttl=64 time=0.019 ms
64 bytes from oracle-se2.example.com (192.168.1.101): icmp_seq=2 ttl=64 time=0.044 ms
64 bytes from oracle-se2.example.com (192.168.1.101): icmp_seq=3 ttl=64 time=0.038 ms

--- oracle-se2.example.com ping statistics ---
3 packets transmitted, 3 received, 0% packet loss, time 1999ms
rtt min/avg/max/mdev = 0.019/0.033/0.044/0.012 ms
1.3.6. cloud-initによる自動設定の一部無効化
以下のコマンドを実行し、cloud-initによる自動設定の一部無効化を設定します。
# vi /etc/cloud/cloud.cfg
...省略...
ssh_pwauth:   true        # 変更
preserve_hostname: true   # 変更
...省略...
manage_etc_hosts: false   # 変更
...省略...
以下のコマンドを実行し、OSを再起動します。
# reboot
以下のコマンドを実行し、SSHログイン設定が正しく設定されている事を確認します。
# grep ^PasswordAuthentication /etc/ssh/sshd_config
PasswordAuthentication yes
以下のコマンドを実行し、ホスト名が正しく設定されている事を確認します。
# hostname
oracle-se2.example.com
以下のコマンドを実行し、ホスト名の名前解決が正しく設定されている事を確認します。
# cat /etc/hosts
...省略...
192.168.1.101 oracle-se2.example.com oracle-se2
1.3.7. tmpfs設定
本書では、以下のtmpfsを設定します。
項目 |
設定値 |
tmpfsサイズ |
16GB |
以下のコマンドを実行し、tmpfsのサイズを設定します。
# vi /etc/fstab
tmpfs /dev/shm tmpfs defaults,size=16G 0 0
以下のコマンドを実行し、OSを再起動します。
# reboot
以下のコマンドを実行し、tmpfsのサイズが正しく設定されている事を確認します。
# df -h
Filesystem             Size  Used Avail Use% Mounted on
...省略...
tmpfs                   16G  929M   16G   6% /dev/shm
...省略...
1.3.8. タイムゾーン設定
本書では、以下のタイムゾーンを設定します。
項目 |
設定値 |
タイムゾーン |
Asia/Tokyo |
以下のコマンドを実行し、タイムゾーンを設定します。
# timedatectl set-timezone Asia/Tokyo
以下のコマンドを実行し、タイムゾーンが正しく設定されている事を確認します。
# timedatectl
Local time: 木 2016-03-24 16:33:23 JST
Universal time: 木 2016-03-24 07:33:23 UTC
RTC time: 木 2016-03-24 07:33:22
Timezone: Asia/Tokyo (JST, +0900)
NTP enabled: yes
NTP synchronized: yes
RTC in local TZ: no
DST active: n/a
1.3.9. Database用ボリュームのマウント
本書では、以下のDatabase用ボリュームをマウントします。
項目 |
設定値 |
デバイスパス |
/dev/vdb※1 |
ファイルシステム |
XFS※2 |
# parted /dev/vdb

GNU Parted 3.1
Using /dev/vdb
Welcome to GNU Parted! Type 'help' to view a list of commands.

(parted) print
Error: /dev/vdb: unrecognised disk label
Model: Virtio Block Device (virtblk)
Disk /dev/vdb: 3299GB
Sector size (logical/physical): 512B/512B
Partition Table: unknown
Disk Flags:
以下のコマンドを実行し、パーティションを作成します。
# parted /dev/vdb
...省略...
(parted) mklabel gpt

(parted) print
Model: Virtio Block Device (virtblk)
Disk /dev/vdb: 3299GB
Sector size (logical/physical): 512B/512B
Partition Table: gpt
Disk Flags:

Number  Start  End  Size  File system  Name  Flags

(parted) mkpart primary xfs 0 -0
Warning: The resulting partition is not properly aligned for best performance.
Ignore/Cancel? Ignore

(parted) print
Model: Virtio Block Device (virtblk)
Disk /dev/vdb: 3299GB
Sector size (logical/physical): 512B/512B
Partition Table: gpt
Disk Flags:

Number  Start   End    Size   Type     File system  Flags
1       1049kB  107GB  107GB  primary  xfs

(parted) quit
Information: You may need to update /etc/fstab.
以下のコマンドを実行し、作成したパーティションを確認します。
# ls -l /dev/vdb*
brw-rw---- 1 root disk 253, 16 Feb  9 10:58 /dev/vdb
brw-rw---- 1 root disk 253, 17 Feb  9 10:58 /dev/vdb1
以下のコマンドを実行し、作成したパーティションにファイルシステムを作成します。
# mkfs.xfs /dev/vdb1
meta-data=/dev/vdb1              isize=256    agcount=4, agsize=201326590 blks
         =                       sectsz=512   attr=2, projid32bit=1
         =                       crc=0        finobt=0
data     =                       bsize=4096   blocks=805306359, imaxpct=5
         =                       sunit=0      swidth=0 blks
naming   =version 2              bsize=4096   ascii-ci=0 ftype=0
log      =internal log           bsize=4096   blocks=393215, version=2
         =                       sectsz=512   sunit=0 blks, lazy-count=1
realtime =none                   extsz=4096   blocks=0, rtextents=0
以下のコマンドを実行し、マウントポイントを作成します。
# mkdir /u01
以下のコマンドを実行し、Database用ボリュームをマウントします。
# mount /dev/vdb1 /u01
以下のコマンドを実行し、Database用ボリュームが正しく認識されている事を確認します。
# df -h
dev/mapper/ol-root    24G   13G   12G   54% /
devtmpfs              3.9G     0  3.9G    0% /dev
tmpfs                 3.9G     0  3.9G    0% /dev/shm
tmpfs                 3.9G  8.7M  3.9G    1% /run
tmpfs                 3.9G     0  3.9G    0% /sys/fs/cgroup
/dev/vda1             497M  143M  355M   29% /boot
/dev/vdb1             100G   33M  100G    1% /u01
# ls /dev/disk/by-uuid/ -l
total 0
lrwxrwxrwx 1 root root 10 Mar  3 16:54 3ebb1ff0-0950-4322-b1d1-cb0462950835 -> ../../dm-2
lrwxrwxrwx 1 root root 10 Mar  3 16:16 5a1cef15-d3e3-4388-bba7-fac730a67e7b -> ../../dm-0
lrwxrwxrwx 1 root root 10 Mar  3 16:16 659ba742-f9bf-4134-839a-5bcf3619ffd2 -> ../../dm-1
lrwxrwxrwx 1 root root 10 Mar  3 16:16 7c414fe9-bec3-402b-8d01-323e746aa5bf -> ../../vda1
lrwxrwxrwx 1 root root 10 Mar  3 16:37 f7d714dd-205b-46ca-875a-735ccdbc1874 -> ../../vdb1

# vi /etc/fstab
...省略...
UUID=f7d714dd-205b-46ca-875a-735ccdbc1874 /u01 xfs defaults 0 0 # 追加
1.3.10. NTPサーバーのIPアドレス指定
本書では、以下のNTPサーバーのIPアドレスを指定します。
項目 |
設定値 |
NTPサーバーのIPアドレス |
お客様ご利用のNTPサーバーのIPアドレス※ |
以下のコマンドを実行し、NTPサーバーのIPアドレスを指定します。
# vi /etc/chrony.conf
...省略...
# server 0.rhel.pool.ntp.org iburst # コメントアウト
# server 1.rhel.pool.ntp.org iburst # コメントアウト
# server 2.rhel.pool.ntp.org iburst # コメントアウト
# server 3.rhel.pool.ntp.org iburst # コメントアウト
server <NTPサーバーのIPアドレス> iburst # 追加
以下のコマンドを実行し、サービスを再起動します。
# systemctl restart chronyd
以下のコマンドを実行し、NTPサーバーのIPアドレスが正しく指定されている事を確認します。
# chronyc sources
210 Number of sources = 1
MS Name/IP address Stratum Poll Reach LastRx Last sample
============================================================
^\* <NTPサーバーのIPアドレス> 2 6 17 7 -28us[ +17us] +/- 44ms
1.3.11. グループの作成
本書では、以下のグループを作成します。
グループ名 |
グループID |
oinstall |
2000 |
dba |
2001 |
backupdba |
2002 |
oper |
2003 |
dgdba |
2004 |
kmdba |
2005 |
以下のコマンドを実行し、グループを作成します。
# groupadd -g 2000 oinstall
# groupadd -g 2001 dba
# groupadd -g 2002 backupdba
# groupadd -g 2003 oper
# groupadd -g 2004 dgdba
# groupadd -g 2005 kmdba
1.3.12. Oracleユーザの作成
本書では、以下のユーザーを作成します。
ユーザー名 |
ユーザーID |
パスワード |
プライマリグループ |
セカンダリグループ |
oracle |
2000 |
お客様指定パスワード |
oinstall |
dba,oper,backupdba,dgdba,kmdba |
以下のコマンドを実行し、oracleユーザーを作成します。
# useradd --uid 2000 --gid oinstall --groups dba,oper,backupdba,dgdba,kmdba oracle
以下のコマンドを実行し、oracleユーザのパスワードを設定します。
# passwd oracle
Changing password for user root.
New password:
Retype new password:
1.3.13. ユーザーリソース制限
本書では、以下のユーザーリソース制限を設定します。
ユーザー名 |
制限リソース |
ソフト制限 |
ハード制限 |
oracle |
nproc |
2047 |
16384 |
oracle |
nofile |
1024 |
65536 |
oracle |
stack |
10240 |
32768 |
以下のコマンドを実行し、ユーザーリソース制限を設定します。
# vi /etc/security/limits.d/99-oracle-limits.conf
oracle soft nproc 2047
oracle hard nproc 16384
oracle soft nofile 1024
oracle hard nofile 65536
oracle soft stack 10240
oracle hard stack 32768
以下のコマンドを実行し、ユーザーリソース制限が正しく設定されている事を確認します。
# su - oracle
$ ulimit -Sa
core file size          (blocks, -c) 0
data seg size           (kbytes, -d) unlimited
scheduling priority             (-e) 0
file size               (blocks, -f) unlimited
pending signals                 (-i) 31471
max locked memory       (kbytes, -l) 64
max memory size         (kbytes, -m) unlimited
open files                      (-n) 1024
pipe size            (512 bytes, -p) 8
POSIX message queues     (bytes, -q) 819200
real-time priority              (-r) 0
stack size              (kbytes, -s) 10240
cpu time               (seconds, -t) unlimited
max user processes              (-u) 2047
virtual memory          (kbytes, -v) unlimited
file locks                      (-x) unlimited

$ ulimit -Ha
core file size          (blocks, -c) unlimited
data seg size           (kbytes, -d) unlimited
scheduling priority             (-e) 0
file size               (blocks, -f) unlimited
pending signals                 (-i) 31471
max locked memory       (kbytes, -l) 64
max memory size         (kbytes, -m) unlimited
open files                      (-n) 65536
pipe size            (512 bytes, -p) 8
POSIX message queues     (bytes, -q) 819200
real-time priority              (-r) 0
stack size              (kbytes, -s) 32768
cpu time               (seconds, -t) unlimited
max user processes              (-u) 16384
virtual memory          (kbytes, -v) unlimited
file locks                      (-x) unlimited
1.3.14. Oracleインストーラーの所有者変更
本書では、以下のOracleインストーラーの所有者を変更します。
項目 |
設定値 |
インストーラーパス |
/software/* |
所有ユーザー |
oracle |
所有グループ |
oinstall |
以下のコマンドを実行し、Oracleインストーラーの所有者を変更します。
# chown -R oracle:oinstall /software/*
以下のコマンドを実行し、Oracleインストーラーの所有者が正しく設定されている事を確認します。
# ls -la /software
Total 4370300
drwxr-xr-x. 2 root root 4096 4/7 10:31 .
dr-xr-xr-x. 19 root root 4096 4/8 12:14 ..
-rw-r--r--. 1 oracle oinstall 918555219 4/7 10:26 client
-rw-r--r--. 1 oracle oinstall 1673591558 4/7 10:26 database
-rw-r--r--. 1 oracle oinstall 1015358809 4/7 10:26 examples
-rw-r--r--. 1 oracle oinstall 867667463 4/7 10:31 grid
1.3.15. Oracleインストーラの展開
本書では、以下のOracleインストーラー展開用ディレクトリを作成します。
項目 |
設定値 |
ディレクトリパス |
/u01/stage/12.1.0.2 |
所有ユーザー |
oracle |
所有グループ |
oinstall |
以下のコマンドを実行し、Oracleインストーラー展開用ディレクトリを作成します。
# mkdir -p /u01/stage/12.1.0.2
以下のコマンドを実行し、Oracleインストーラー展開用ディレクトリの所有者を変更します。
# chown -R oracle:oinstall /u01
以下のコマンドを実行し、Oracleインストーラを展開(コピー)します。
# su - oracle
$ cp -r /software/database /u01/stage/12.1.0.2
以下のコマンドを実行し、Oracleインストーラが正しく展開(コピー)されている事を確認します。
$ ls /u01/stage/12.1.0.2/database
install response rpm runInstaller sshsetup stage welcome.html
1.3.16. ORACLE_BASEディレクトリの作成
本書では、以下のORACLE_BASEディレクトリを作成します。
項目 |
設定値 |
ディレクトリパス |
/u01/app/oracle |
以下のコマンドを実行し、ORACLE_BASEディレクトリを作成します。
$ mkdir -p /u01/app/oracle


