3.4. Oracleソフトウェアのインストール
3.4.2. インストーラーの実行
注釈
Smart Data Platform で提供されているOracle Database入りのWindows Serverテンプレートは、英語版のため、Oracle Databaseインストーラーおよび各種ツールの表示が英語表示となります。日本語表示をご希望の場合、Windows Serverの言語設定を行うこと>で表示の変更が可能です。変更方法は、「 付録A 英語表示から日本語表示への変更方法 」を参照ください。
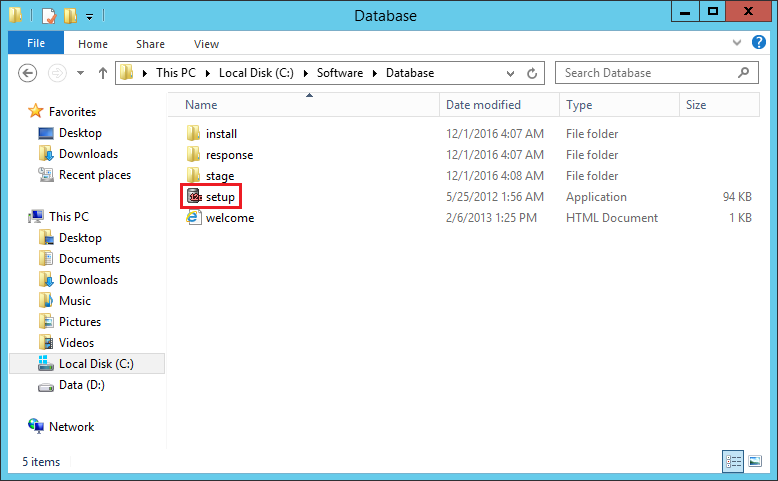
C:\Software\Database 内の setup.exe をダブルクリックし、インストーラーを起動します。
[User Account Control] ウィンドウで、 [Yes] を選択します。
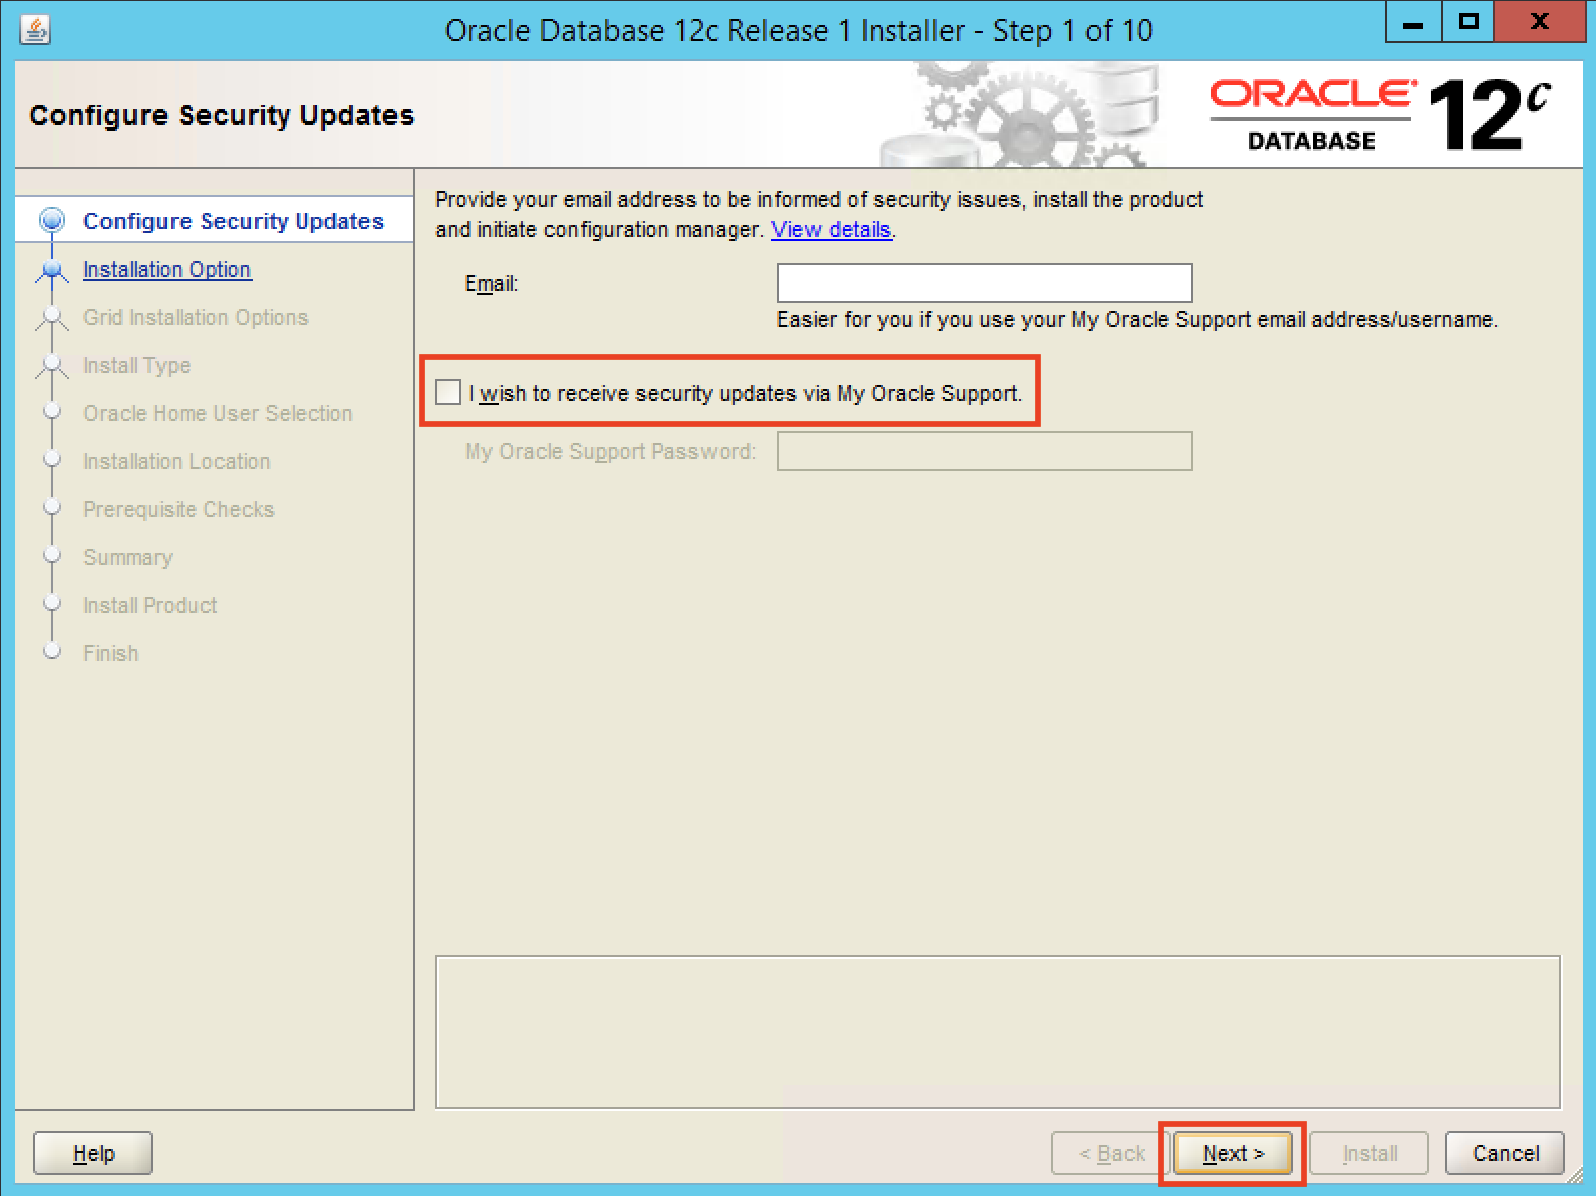
[Configure Security Updates] ウィンドウで、 [I wish to receive security updates via My Oracle Support.] のチェックを外します。
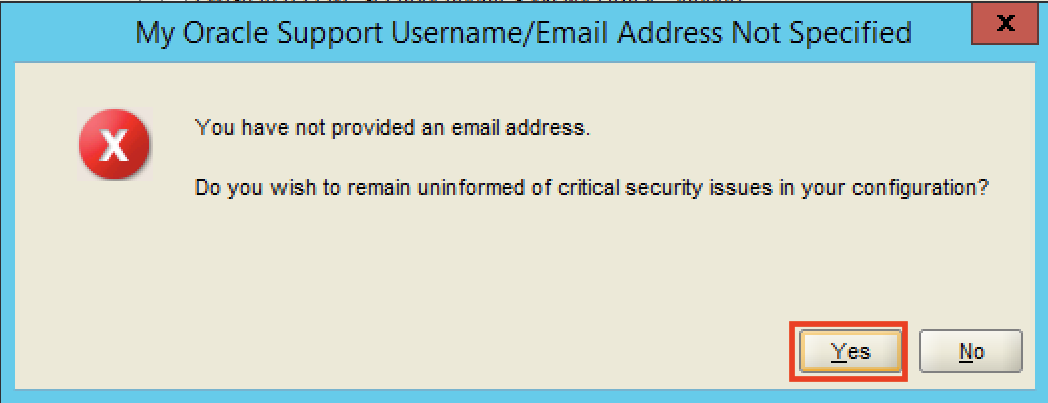
[My Oracle Support Username/Email Address Not Specified] ウィンドウで、 [Yes] を選択します。
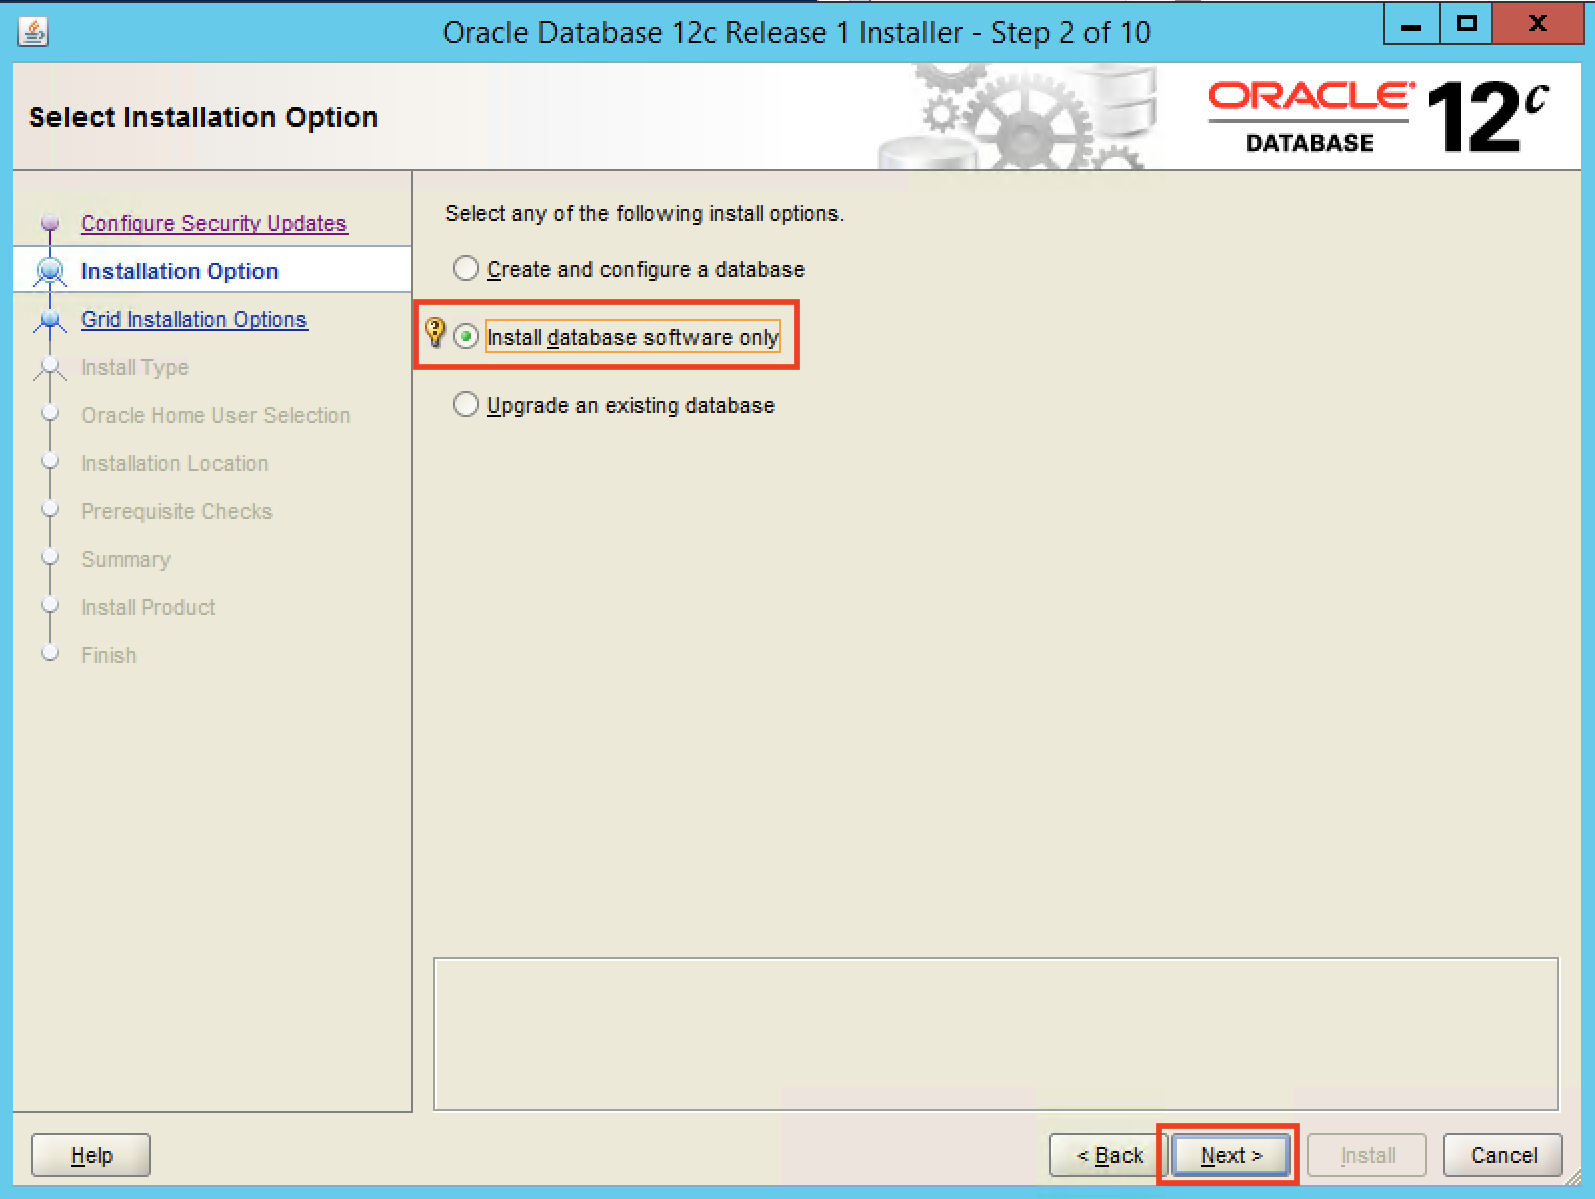
[Select Installation Option] ウィンドウで、 [Install database software only] を選択します。
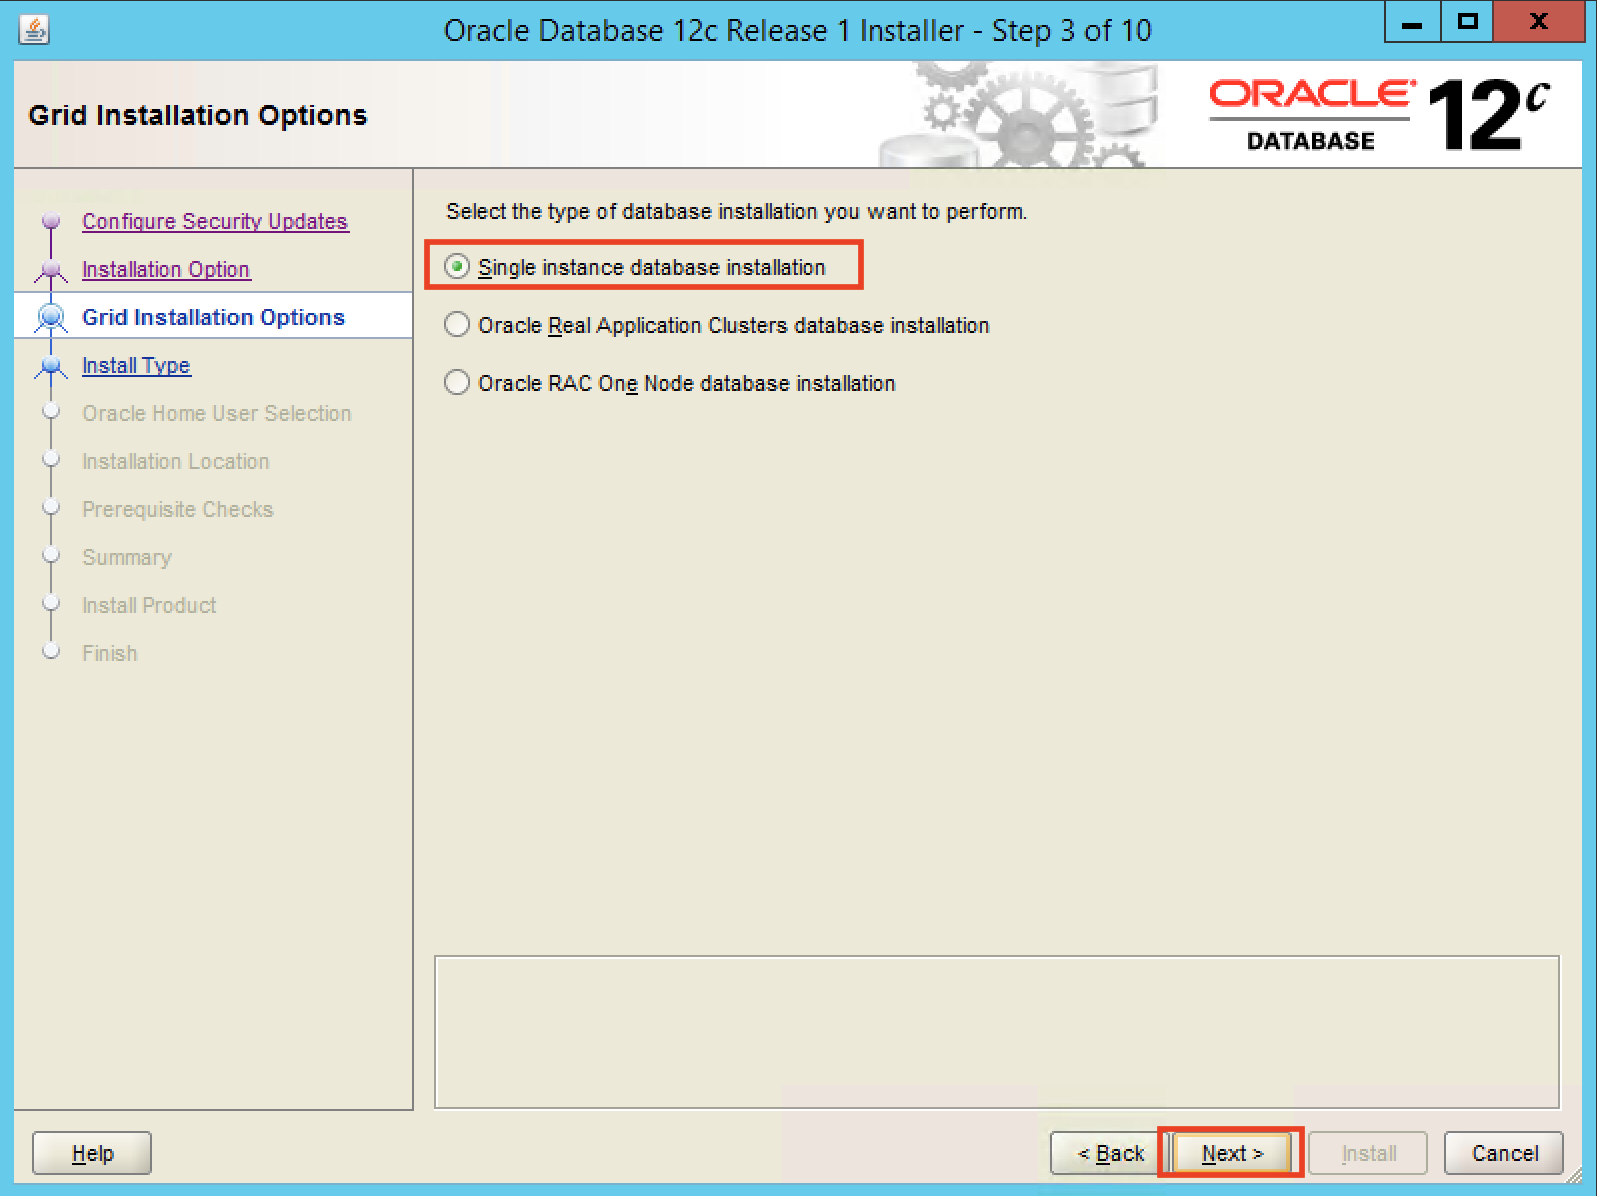
[Grid Installation Options] ウィンドウで、 [Single instance database installation] を選択します。
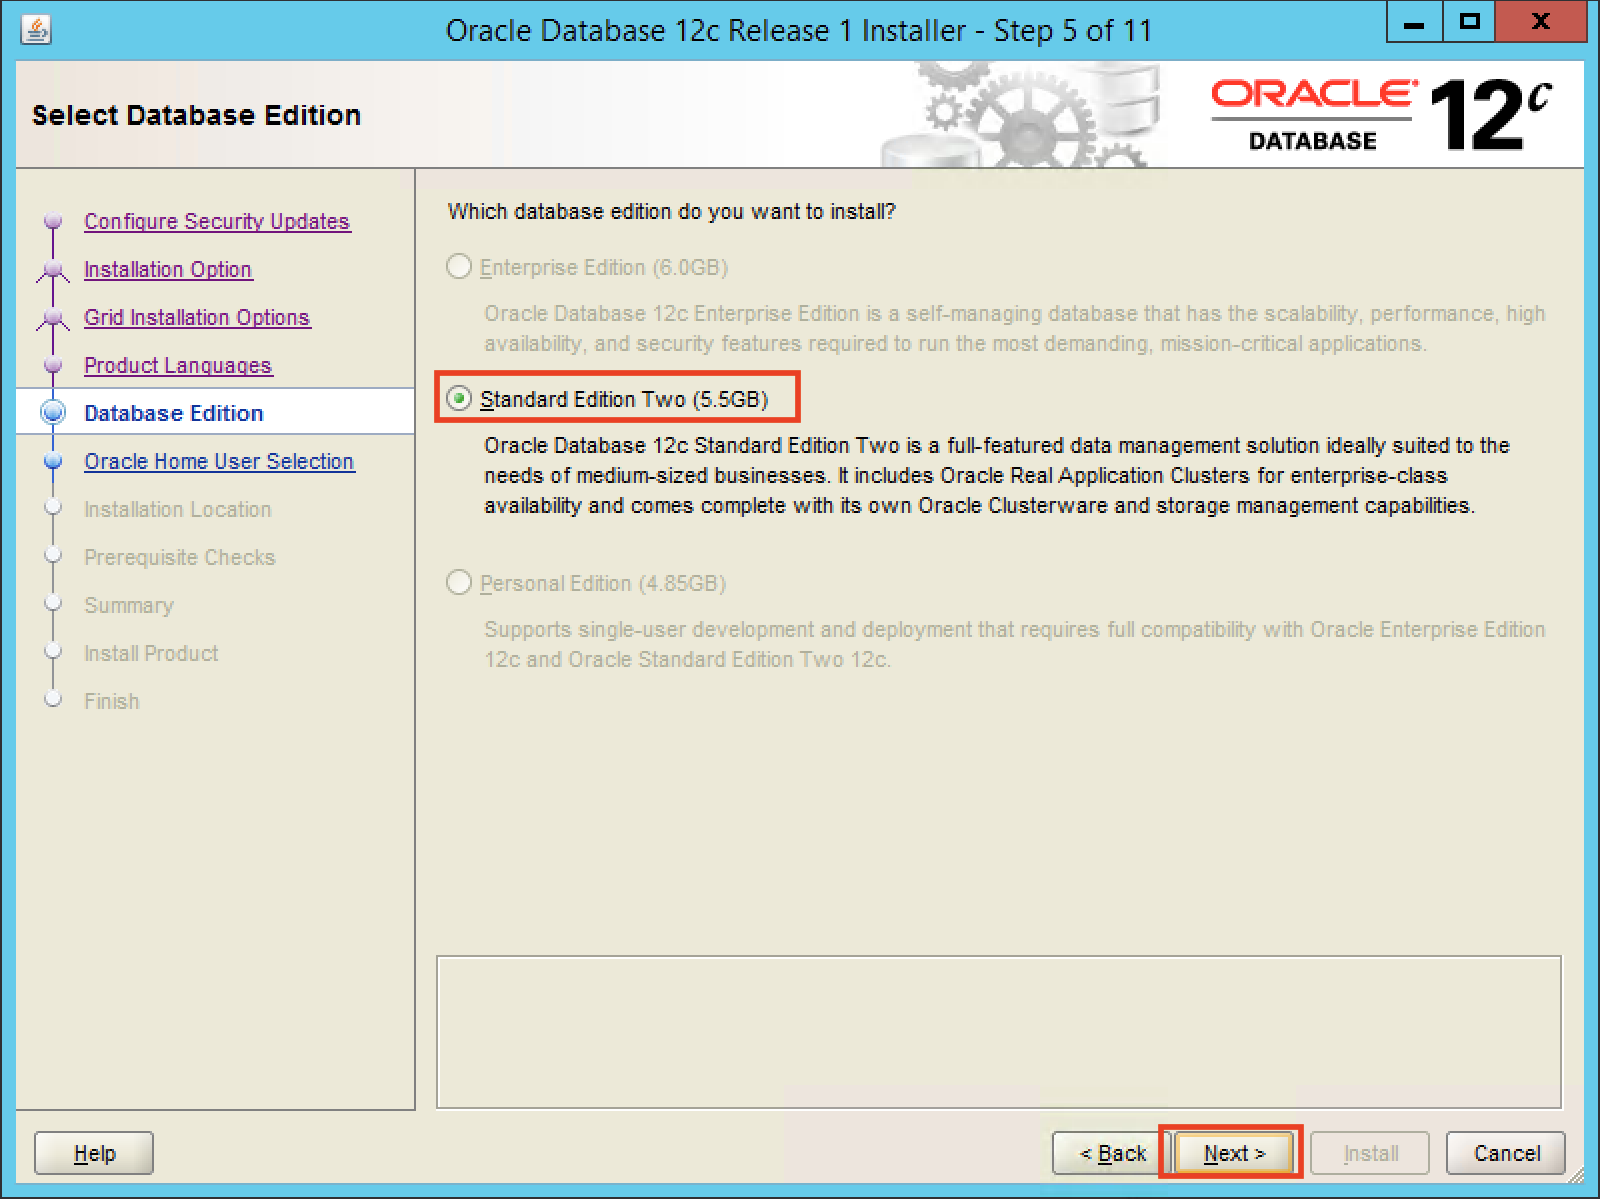
[Select Database Edition] ウィンドウで、 [Standard Edition Two] を選択します。
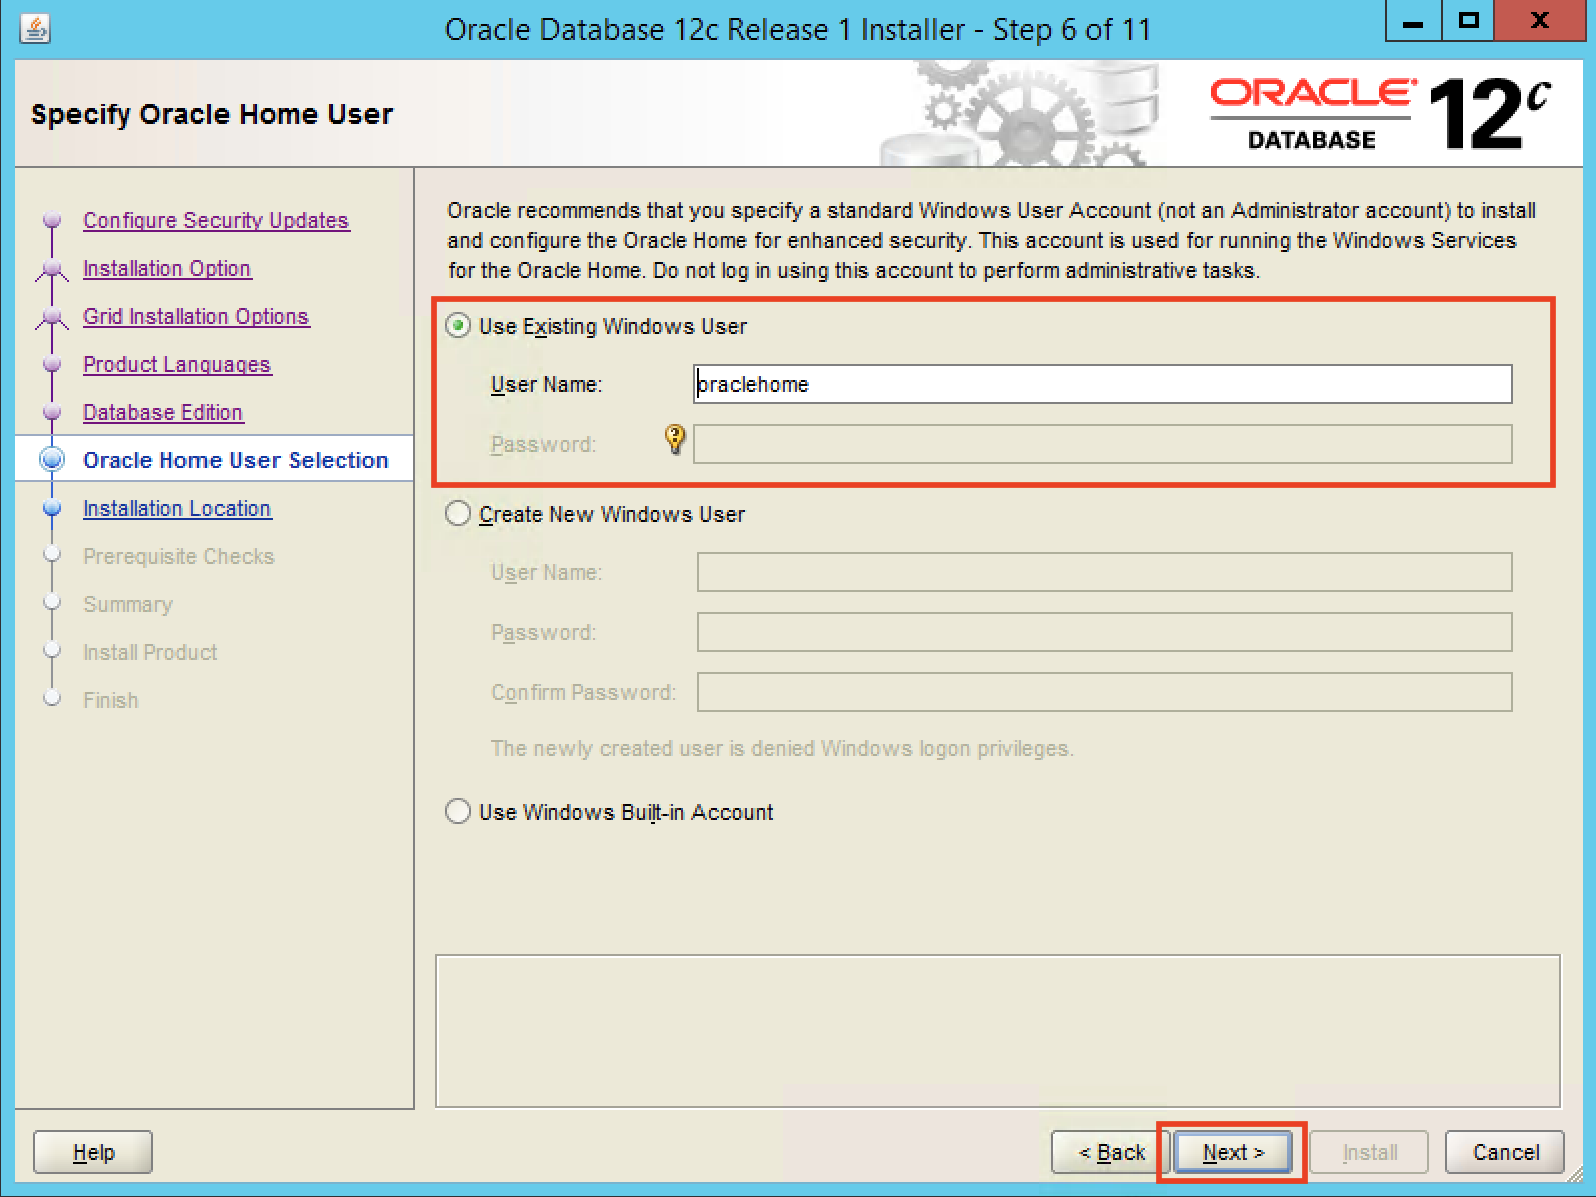
[Specify Oracle Home User] ウィンドウで、以下の項目を入力します。
項目 |
設定値 |
Use Existing Windows User |
選択 |
User Name |
oraclehome |
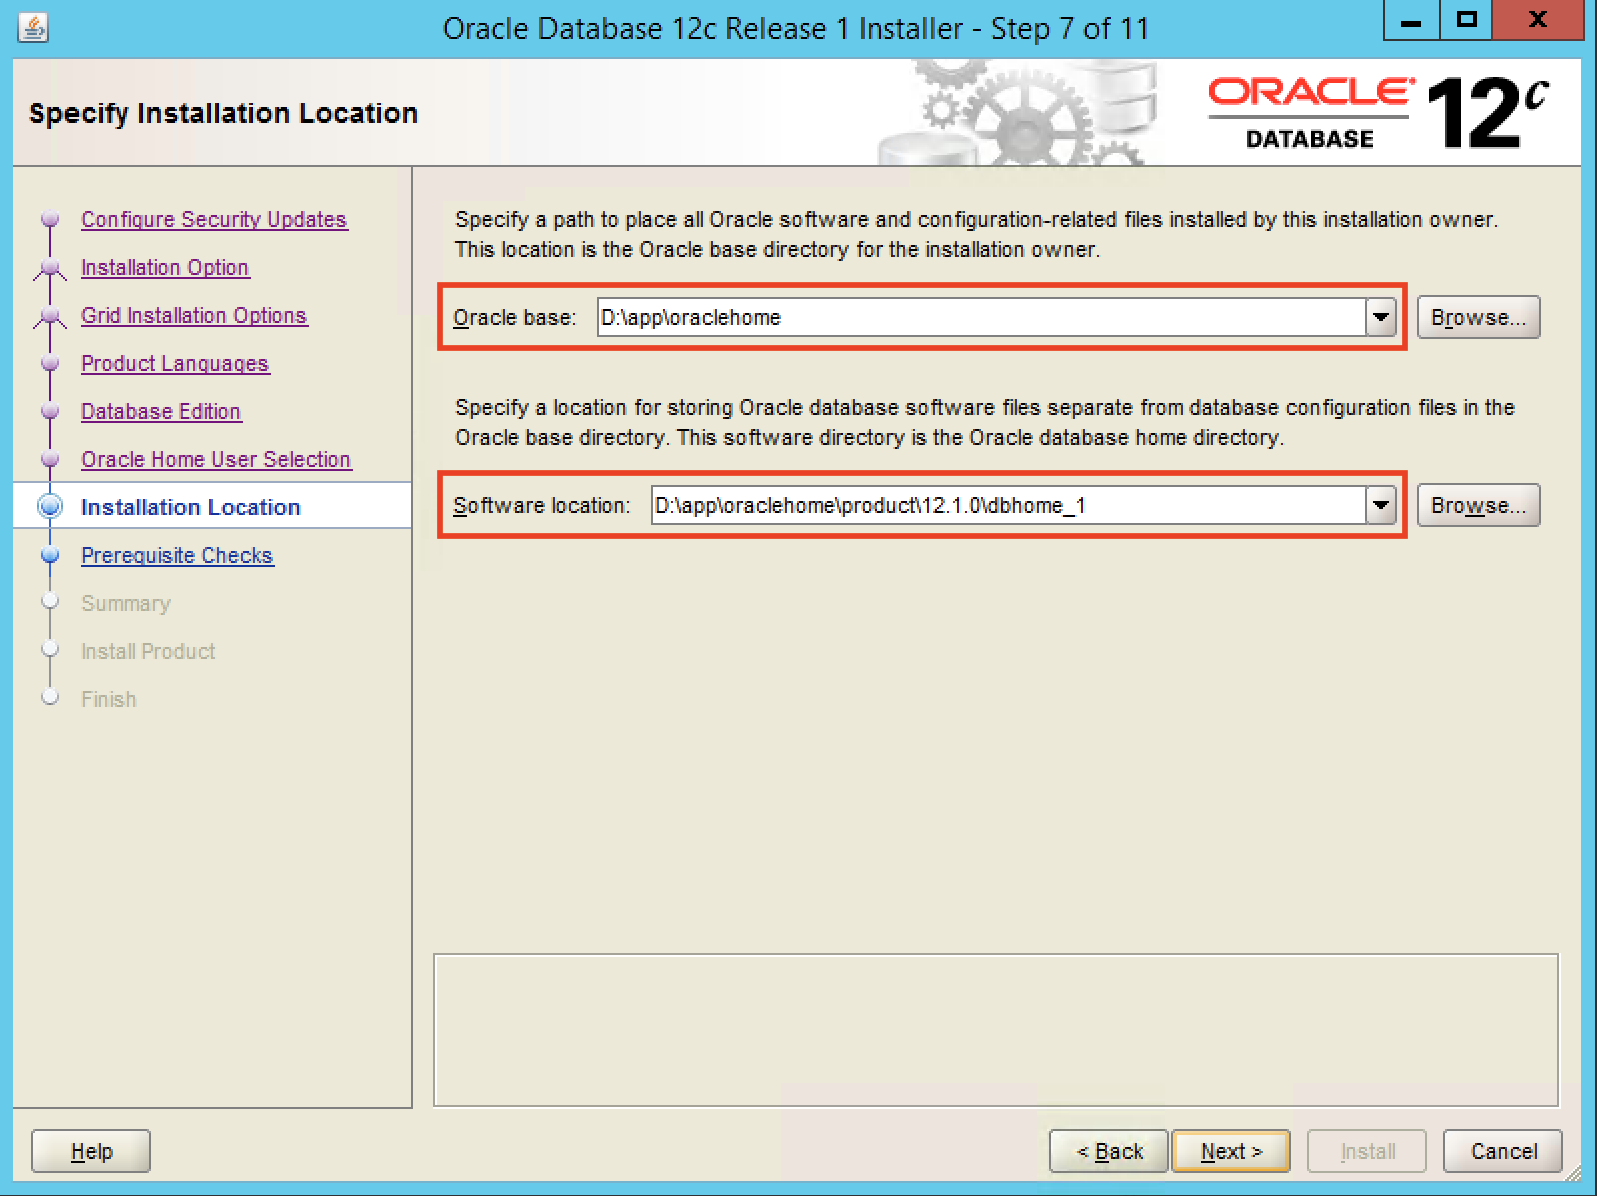
[Specify Installation Location] ウィンドウで、 以下の値を選択します。
項目 |
設定値 |
Oracle base |
D:\app\oraclehome |
Software Location |
D:\app\oraclehome\product\12.1.0\dbhome_1 |
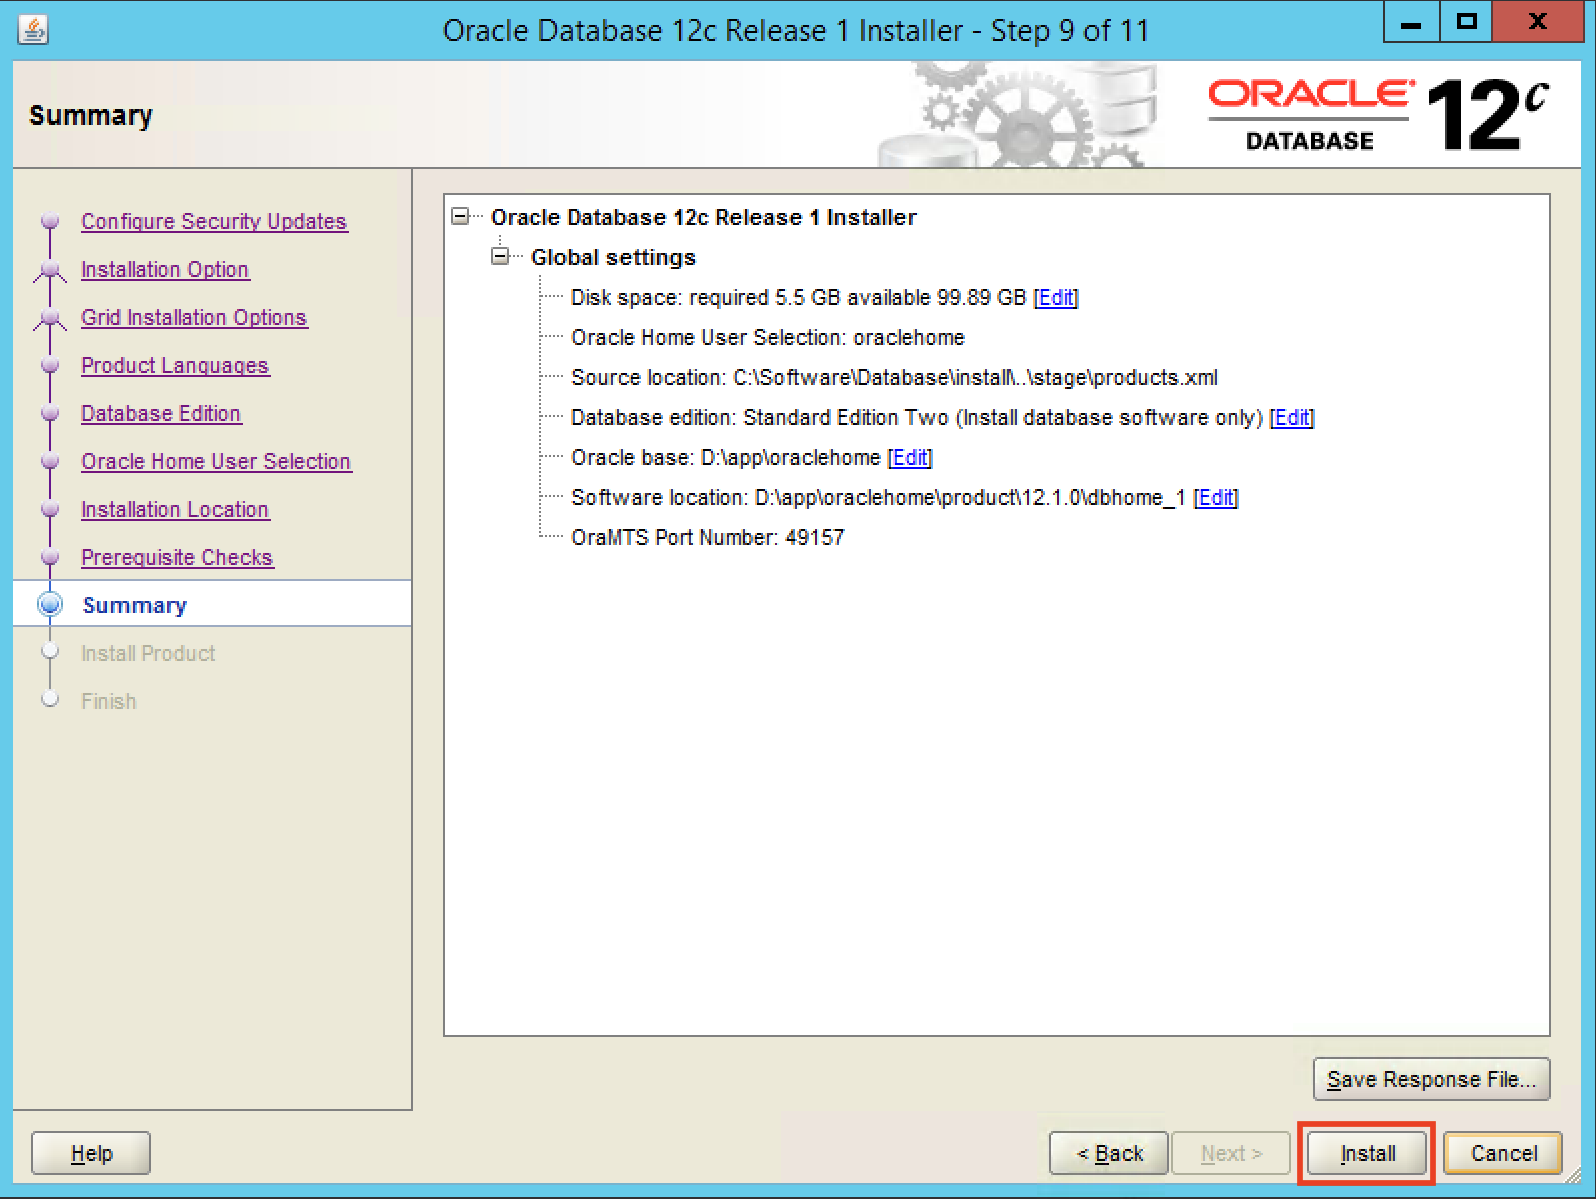
[Summary] ウィンドウで、設定を確認し、 [Install] を選択します。
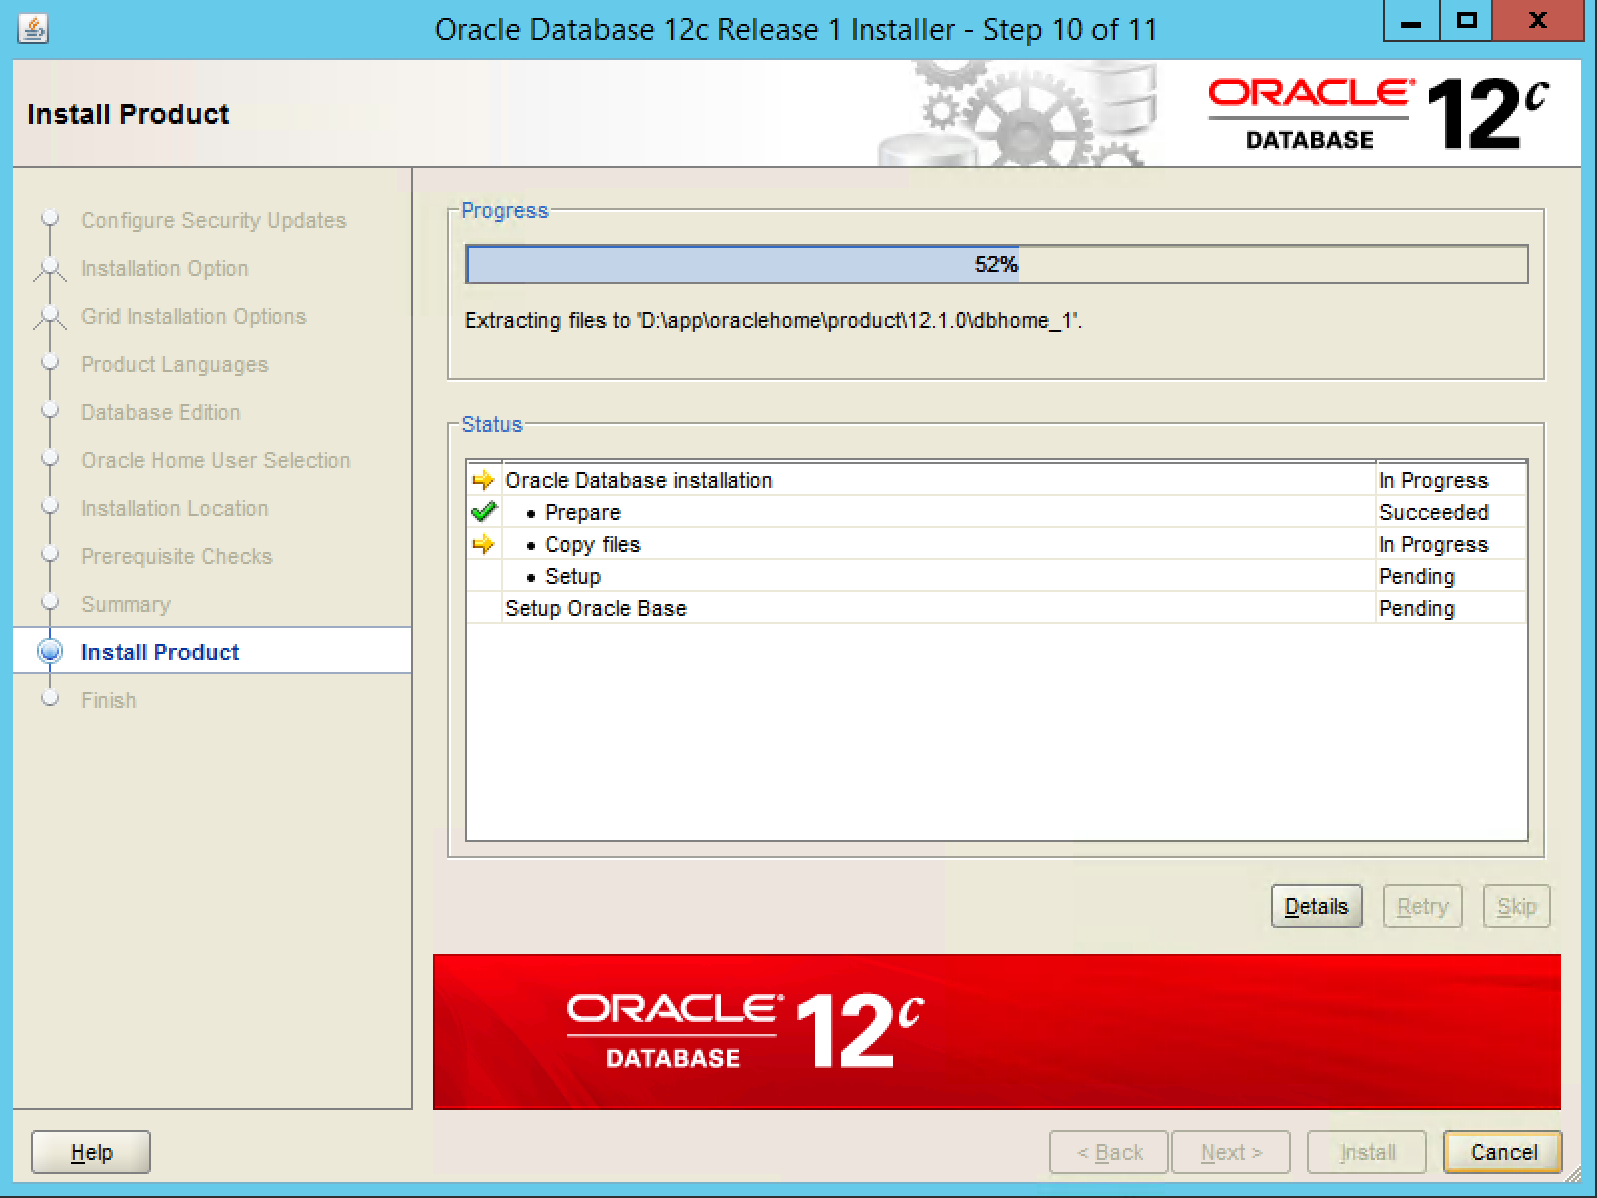
[Install Product] ウィンドウで、インストールが開始された事を確認します。
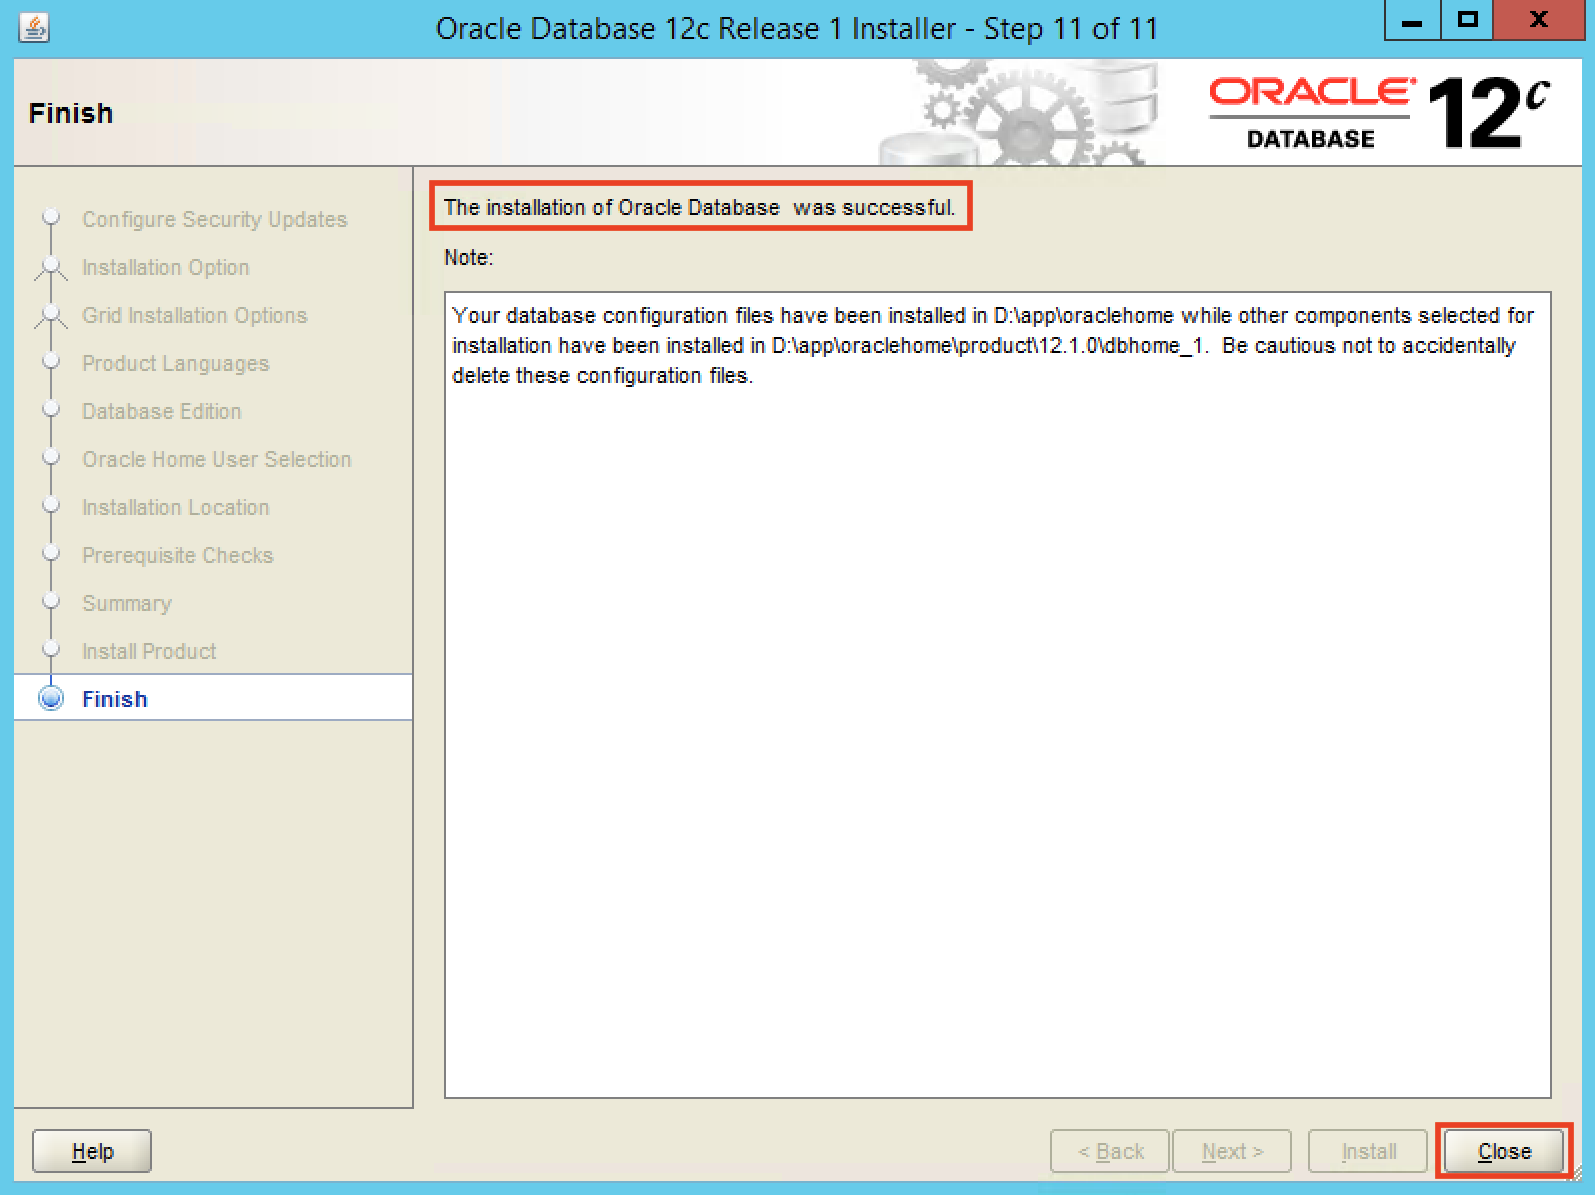
[Finish] ウィンドウで、 [The installation of Oracle Database was successful.] を確認し、 [Close] を選択します。
